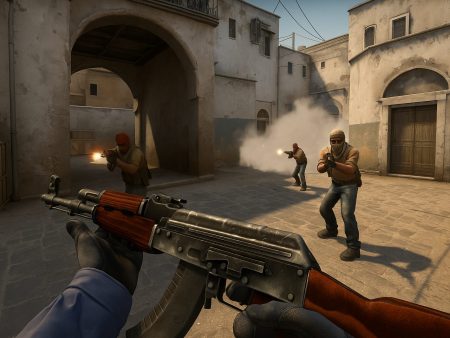
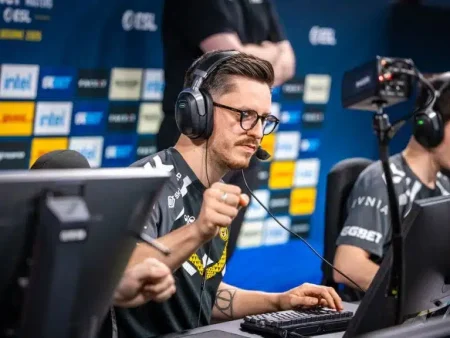
Master your aim in CS2 with pro-level crosshair placement and pre-aiming techniques. Learn drills, settings, and smart habits to dominate every duel and rank up fast.
CS2 (Counter-Strike 2) has raised the bar for competitive shooters by bringing a refined Source 2 engine, sharper visuals, and even more precise hit registration. And with these improvements, the importance of mechanical aim has skyrocketed. In CS2, raw aim can be the difference between climbing ranks or staying stuck in silver hell. Whether you’re holding an angle or entry-fragging into a bombsite, your ability to land precise shots quickly determines your impact in each round.
Unlike many modern shooters that rely heavily on abilities or gadgets, CS2 sticks to its roots—where crosshair placement, pre-aiming, and crisp flicks decide the outcome. Aim isn’t just about reaction speed—it’s about anticipation, positioning, and having your crosshair exactly where the enemy’s head will be. Better aim means more confidence in duels, better K/D ratios, and a smoother path toward ranking up.
As you improve your aim, everything else in your gameplay—movement, utility usage, and positioning—starts to come together. Why? Because good aim buys you time. It reduces your exposure, wins you fights, and makes even the hardest clutches feel winnable. Bottom line: if you want to improve fast in CS2, aim is your number one priority.
Overview of Crosshair Placement and Pre-aiming
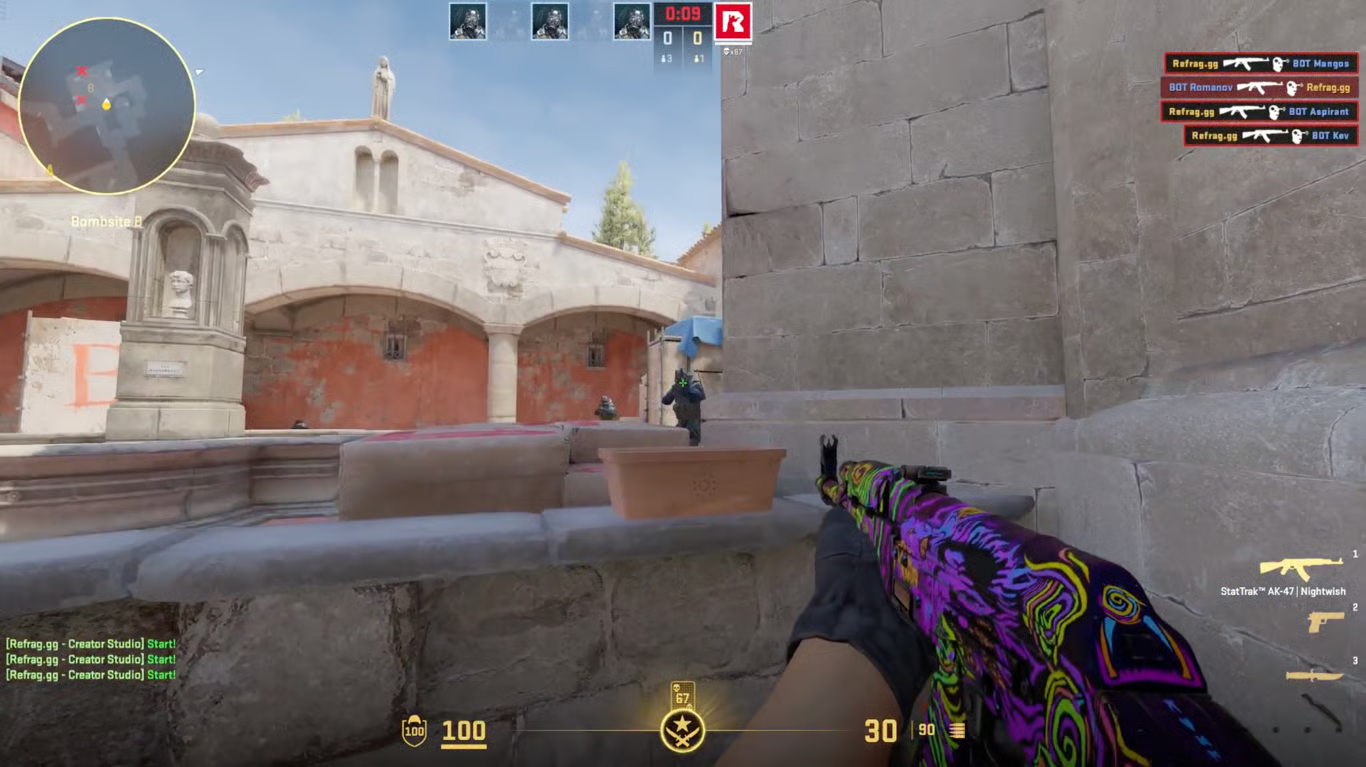
When most players talk about improving aim, they jump straight into flick shots or raw reaction time drills. But the truth is, the foundation of great aim is intelligent crosshair placement and consistent pre-aiming. Crosshair placement refers to where you’re keeping your aim as you move through the map. It should always be at head level and pointed toward likely enemy positions—corners, boxes, entrances.
Pre-aiming, on the other hand, is about prediction. It’s the skill of moving your crosshair to a spot before the enemy appears, based on game sense and map knowledge. This reduces the need for big flicks and boosts your first-shot accuracy. Together, these techniques let you take high-percentage fights and dominate opponents who aren’t as prepared.
These aren’t flashy skills, but they’re the bedrock of elite-level aiming. We’re going to dig deep into both—teaching you the why, the how, and the drills that’ll make crosshair placement and pre-aiming second nature.
Understanding CS2 Mechanics and How They Impact Aiming
Weapon Accuracy and Bullet Spread
CS2 brings subtle but impactful changes to weapon behavior compared to CS:GO. Bullet spread, weapon accuracy, and first-shot precision are all tuned tighter in CS2—making your aim matter even more. Every weapon has a unique spray pattern and accuracy profile. For rifles like the AK-47 or M4A4, the first bullet is usually accurate if you’re standing still. But the more you shoot, the wider the spread becomes unless you compensate with precise spray control.
If you’re moving, even slightly, your bullets will go haywire. This is where movement mechanics like counter-strafing become critical. A common mistake newer players make is trying to shoot while moving—causing their shots to miss even if their crosshair is dead on. Standing still (or stopping quickly) before firing is key to landing accurate shots.
Shotguns and SMGs behave differently—some have decent running accuracy, especially the MP9 or MAC-10. But for rifles and pistols, standing accuracy is crucial. Once you understand your weapon’s behavior, you’ll start placing your crosshair more purposefully, and that translates to instant kills instead of random whiffs.
Movement vs. Shooting Accuracy
CS2’s movement system is unforgiving when it comes to accuracy. If you’re not stationary (or perfectly counter-strafed), your bullets will scatter. Every step you take before shooting affects your aim, and knowing how to use movement to your advantage is a massive part of becoming a sharp shooter.
What’s counter-strafing? It’s when you quickly tap the opposite movement key (like pressing “A” after moving right with “D”) to stop instantly and shoot with perfect accuracy. Top players use this constantly when jiggle-peeking or repositioning. Without counter-strafing, you’re just shooting on the move—and in CS2, that means missing.
This also ties into crosshair placement. When you’re checking angles, you want to stop, shoot, and re-peek with perfect timing. Great movement allows your aim to shine. Sloppy movement makes even perfect crosshair placement useless because your bullets go wild.
Recoil Patterns in CS2
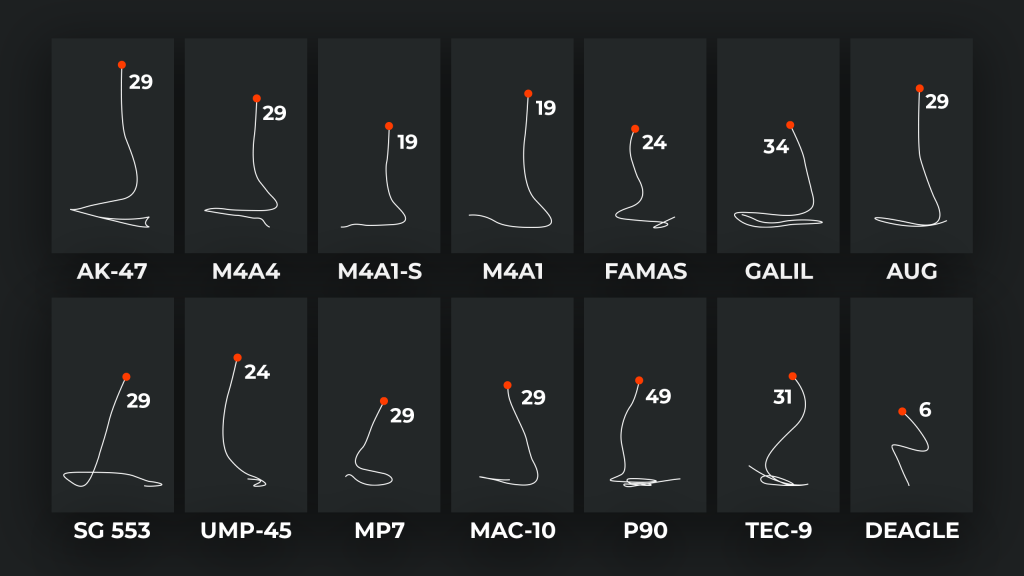
Every rifle in CS2 has a unique recoil pattern—a specific path that your bullets follow when you hold down the trigger. Learning these patterns and how to control them is a massive step in improving your aim. The AK-47, for instance, has a predictable left-right-up motion in the first 10 bullets. You can “learn” to pull your mouse in the opposite direction to keep your shots tight.
However, crosshair placement makes recoil easier to manage. If you’re aiming at head level and in the right spot before an enemy peeks, you often won’t even need to spray—you’ll land a one-tap or quick burst and win the duel cleanly.
Some tips:
- Use workshop maps like “Recoil Master” to practice controlling spray.
- Focus on bursting instead of full spraying, especially at longer ranges.
- Watch how pro players reset their aim between bursts—they don’t panic-spray.
By mastering recoil and combining it with perfect pre-aims, you’ll become a laser with your rifles.
Crosshair Placement Fundamentals
What is Crosshair Placement?
Crosshair placement is the bread and butter of top-tier aim. It’s the art of keeping your crosshair in the ideal position so that you barely have to move your mouse when an enemy appears. This means you’re aiming at where enemies are most likely to be—usually at head level and near common peeking spots.
Most new players walk around with their crosshair pointed at the ground or chest level. This might seem harmless, but in a game where milliseconds matter, moving your crosshair upwards or across your screen to align with an enemy’s head costs time—and often, the fight.
Good crosshair placement:
- Anticipates enemy positions before they appear
- Minimizes crosshair movement required to shoot
- Keeps your aim centered as you clear angles
The goal is to make your reaction time faster not by becoming a robot, but by having less distance to cover with your mouse. If your crosshair is already where the enemy will be, all you need to do is click.
Eye Level and Common Angles
Let’s talk eye level. You always want your crosshair to be at the height of the enemy’s head. This varies slightly from map to map and angle to angle, but the general idea is this: if someone swings out, your crosshair should already be sitting on their face.
How do you know where head height is? Easy—play deathmatch and get used to the visual cues. Learn what “head level” looks like near boxes, behind barrels, or in doorways. Another trick? Watch pro players. You’ll notice they rarely move their crosshair up or down in panic—they’re already aimed perfectly.
Now, pair that with knowing common angles. These are the spots players frequently hold—like:
- Behind Double Doors on Dust2
- Close Ramp on Mirage A site
- Headshot box on Vertigo B
If you always move your crosshair in a way that aligns with these common spots, your aim will naturally improve. Walk into a site like you expect someone there—because they often are.
Keeping Your Crosshair Close to Enemy Models
Many players make the mistake of centering their crosshair in the middle of the screen instead of placing it based on map geometry and enemy positions. If your crosshair is constantly “floating” in random spots, you’ll waste valuable time readjusting during a duel.
The idea here is to reduce “micro-adjustments.” Let’s say you’re peeking a corner. Instead of placing your crosshair dead center on the wall, place it where an enemy head would be if they’re holding that angle. This is called “cutting the pie”—a methodical way to clear angles by moving your crosshair incrementally from one spot to the next.
Some practical tips:
- As you round a corner, keep your crosshair close to the edge. This ensures you’re not caught with your aim too far off when someone peeks.
- If you’re entering a bombsite, place your crosshair on the first likely angle—then immediately pre-aim the next.
Professional players like s1mple or NiKo don’t just have fast aim—they have smart aim. Their crosshair does most of the work before the duel even starts.
Advanced Crosshair Placement Techniques
How to Pre-aim Common Angles
Pre-aiming is one of the strongest habits you can build as a CS2 player. It’s the act of positioning your crosshair exactly where an enemy is likely to be—before you actually see them. This goes hand-in-hand with map knowledge, and it’s what separates good aimers from insanely efficient killers.
Let’s break it down:
- When walking into A Long on Dust2, you might pre-aim the car position.
- On Inferno, walking up Banana, you’d pre-aim logs or sandbags.
- In Mirage B apps, you’d pre-aim van or bench before fully peeking.
The key is: don’t wait to react to what’s on your screen. Instead, move your crosshair based on expectation. This drastically cuts down the time needed to flick, and it massively increases your chances of landing the first shot.
Here’s a simple pre-aim drill:
- Load into an offline game with bots.
- Walk through a bombsite slowly.
- Stop and place your crosshair where you think enemies could be.
- Repeat it until it becomes muscle memory.
Pro players do this constantly. They don’t walk around randomly looking at walls—they pre-aim 3-4 spots as they clear an area, before an enemy even appears.
Using Map Knowledge to Place Your Crosshair
Crosshair placement is directly linked to how well you understand each map. The more you play, the more you’ll pick up on tendencies—where people like to hide, peek, and rotate from. Once you start learning this, you’ll naturally place your crosshair in better spots.
For example:
- On Overpass, you know players love peeking from Party or Truck.
- On Anubis, common hold spots include behind Temple or on the Heaven balcony.
- In Ancient mid, enemies frequently crouch behind boxes or peek from Donut.
If you’re peeking an area and not sure where to look, that means your crosshair placement will be off. Watching pro matches or reviewing your own demos helps. Ask yourself: where did I get shot from most often? Now start pre-aiming that spot every time.
A good exercise:
- Open up the map in offline mode.
- Go through every choke point.
- Ask: “If I was holding this, where would I be?”
- Place your crosshair there and repeat.
With time, your brain starts to predict enemy positions, and your aim becomes effortless.
Practicing with Aim Training Maps
Nothing beats good ol’ repetition. Aim training maps like “Aim Botz”, “training_aim_csgo”, and “Yprac” maps are goldmines for improving crosshair placement and pre-aiming. They help develop muscle memory, flick control, and most importantly, angle clearing habits.
Here’s how to use them effectively:
- In Aim Botz: don’t just spray. Focus on headshots only. Move your crosshair as little as possible to eliminate each bot.
- In Yprac maps: use angle training scenarios where bots peek from common angles. This forces you to use proper pre-aiming and crosshair discipline.
- Use time-limited drills. For 15 minutes, only work on keeping your crosshair at head height and reducing unnecessary movement.
Remember: the goal isn’t just to click heads. It’s to build smart aim, and that starts with thoughtful, purposeful reps—not just mindless shooting.
Pre-aiming in CS2
What is Pre-aiming and How is it Different from Pre-firing?
Pre-aiming is all about getting your crosshair in the right spot before the fight begins. Pre-firing, on the other hand, means shooting before you see the enemy—usually to catch them off-guard. While both require game sense, they serve different purposes.
Let’s say you’re about to peek A Short on Mirage:
- Pre-aiming would mean moving your crosshair to head level at Ticket Booth before peeking—ready to click as soon as an enemy appears.
- Pre-firing means you shoot as you peek, hoping to catch someone holding the angle.
Pre-aiming is safer, smarter, and more consistent. It doesn’t waste ammo or give away your position. It’s the bread and butter of elite aim. Pre-firing is more situational—it works when you know or strongly suspect someone’s holding a tight angle.
Smart players rely heavily on pre-aiming and only use pre-firing as a tactical tool. It’s the difference between a thinking aimer and a spraying-and-praying one.
Predicting Enemy Positions Through Game Sense
Game sense is the invisible sixth sense that top players develop over thousands of hours. It’s that gut feeling telling you, “Someone’s probably hiding behind that box,” or “He’ll swing after I throw this flash.” When paired with pre-aiming, game sense becomes a deadly tool.
So how do you build it?
- Learn timings – On every map, there are common timings for when an enemy might reach a certain spot. For example, if you rush B on Inferno, a CT might peek from CT spawn or Coffins after 10 seconds. If you pre-aim those spots based on timing, you’ll often be one step ahead.
- Read the round – Think: What utility have they used? Have I seen anyone rotate? Did my teammate die on the other site? All these cues help you predict likely enemy locations.
- Watch demos – Observing your own replays or pro matches can highlight patterns. Maybe enemies always push B apps on eco rounds. Maybe the same guy hides behind Ninja on A site every time.
Over time, your brain will start to connect these dots automatically. This allows you to pre-aim not just randomly but with purpose. That’s the true power of combining game sense with mechanics.
Pre-aiming Drill Techniques
If you’re serious about improving, you need to isolate and train pre-aiming like a skill in the gym. There are tons of effective drills you can do daily to make it second nature.
Here are three high-impact pre-aiming drills:
- Map Walking Drills (Offline with Bots or Empty Server):
- Walk through maps slowly.
- As you enter each new area, place your crosshair exactly where a head might appear.
- Do this while moving at walking speed to simulate a real match.
- Repeat until you hit every common angle in sequence.
- Angle Training in Yprac Maps:
- Use maps like “Yprac Mirage A” or “Yprac Dust2 Mid.”
- Select the “peek scenario” and practice aiming at bots placed in real enemy positions.
- The map will even score you based on how accurate your pre-aim was.
- Pre-aim Challenge Routines:
- Set a goal: hit 20 clean headshots with minimal crosshair adjustment per map.
- Focus on reducing how much you flick or adjust—aim for zero movement between seeing the enemy and shooting.
By repeating these drills, your brain builds a library of pre-aim positions. Eventually, it becomes second nature to move your crosshair to the right spot as you enter a new area.
Combining Crosshair Placement and Pre-aiming for Lethal Accuracy
Syncing Movement and Aim
One of the biggest secrets to top-tier aim is syncing your movement with your crosshair placement. That means your body (movement) and your brain (aim) are working together—fluidly, confidently, and efficiently. Without this synergy, you’ll find yourself missing easy shots, panicking in duels, or constantly over-correcting.
What syncing looks like in practice:
- Peeking with purpose: You don’t just wide-swing a corner—you peek knowing your crosshair is already aimed where the enemy might be.
- Counter-strafing instinctively: As soon as you stop moving, you’re ready to shoot with full accuracy. No delay, no second-guessing.
- Smooth transitions between angles: As you clear angles, your crosshair moves in harmony with your movement—never erratic, never lagging behind.
Most players either over-rely on movement (jiggle peeking wildly with no aim control) or sit still and aim (becoming an easy target). The sweet spot? A controlled dance between movement and pinpoint crosshair placement.
Here’s a practical drill:
- Go into an aim training map.
- Practice strafing left and right, stopping instantly, and placing your crosshair exactly where an enemy might be.
- Don’t shoot. Just place and move.
- Then, start taking shots when you feel the rhythm syncing.
This will build the muscle memory needed to be deadly under pressure.
How to Clear Angles Efficiently
Angle clearing is an essential skill in CS2. Done right, it minimizes risk and maximizes your chance of winning duels. Done wrong, it’s a recipe for instant death. Efficient angle clearing combines crosshair placement, pre-aiming, movement, and patience.
Here’s how to do it efficiently:
- One angle at a time – Never “lazy clear” multiple angles. You’re not Rambo. Take your time, isolate threats, and only expose yourself to one potential enemy at a time.
- Cut the pie – This is a methodical way to slice through angles as you move. Imagine clearing a site like slicing a pie—each sliver is a different potential enemy spot. Move your crosshair and body angle slightly as you check each slice.
- Headshot pre-aims – At each step, place your crosshair before you peek. If someone is there, you only need to click. No flicks. No panic.
- Don’t over-swing – When clearing corners, especially tight ones, use shoulder peeks or quick jiggles to bait out a shot. Then re-peek with confidence.
Pro tip: Watch how top players clear a site on demos. Every movement is deliberate. Every pre-aim is laser-focused. They rarely get surprised—because they’re clearing with purpose.
Real Match Scenarios Where Both Are Crucial
Let’s walk through a few scenarios where combining crosshair placement and pre-aiming wins rounds:
Scenario 1: Dust2 A Long Entry
- You’re T-side pushing A Long.
- As you clear blue container, you pre-aim corner at head height.
- As you turn the corner, you adjust slightly for pit, then for car.
- Boom—enemy peeks from car. You don’t flick. You just click. Dead.
Scenario 2: Inferno Banana Hold (CT Side)
- You’re holding banana with an M4.
- You know Ts like to peek from logs or wide-swing sandbags.
- You place your crosshair for the first log peek, then adjust slightly to the right.
- Enemy jiggle peeks. Your aim is already there—instant headshot.
Scenario 3: Mirage B Site Retake
- You’re rotating cat to help B.
- As you come through market, you pre-aim bench, then van, then default.
- Enemy swings from van—but your crosshair was already halfway there.
- You adjust, click, and clean it up.
In all these cases, it’s not just aim that wins. It’s smart aim—powered by good crosshair placement and strong pre-aiming habits.
Best Crosshair Settings for Improved Aim
Choosing the Right Crosshair Style
Your crosshair is your compass. It’s your guide for every shot you take. If it’s too distracting, too small, or blends into the environment, you’re already handicapping yourself. In CS2, you have full control over your crosshair—shape, color, gap, thickness, outline, and even dynamic behavior. Choosing the right one can significantly boost your aim by improving visibility and focus.
There’s no “one-size-fits-all,” but here’s what to keep in mind:
- Simplicity is key – Avoid thick outlines or flashy styles. You want a minimalistic, static crosshair that doesn’t clutter your screen.
- Color contrast – Use colors that stand out against every map (cyan, magenta, bright green). Avoid white or red as they often blend in.
- Size and gap – Make sure your crosshair isn’t so big that it covers heads, or too small to see clearly during fights.
For beginners, a static crosshair with a small gap and thick enough lines to track accurately is a great start. Test it in a deathmatch to see how it feels. If you’re constantly losing track of your crosshair in fights, it’s time to adjust it.
Dynamic vs. Static Crosshair
Dynamic crosshairs expand when you move or shoot, while static ones stay consistent no matter what you’re doing. Each has pros and cons.
- Static Crosshair:
- Pros: Cleaner, consistent, doesn’t move or distract
- Cons: No feedback on accuracy while moving
- Best for: Players who already know how CS2 movement affects shooting
- Dynamic Crosshair:
- Pros: Shows when you’re inaccurate, useful for learning movement-based inaccuracy
- Cons: Distracting, can feel clunky
- Best for: New players who want visual feedback
The majority of pro players use static crosshairs. Once you’ve internalized movement mechanics and shooting accuracy, a static crosshair becomes superior—fewer distractions, better muscle memory, and easier pre-aiming.
If you’re just starting out, try dynamic first to build awareness—then switch to static as you progress.
Pro Player Crosshair Codes to Try
Here are some popular pro player crosshairs you can try right now in CS2. Just copy the code and paste it into your settings to instantly load their crosshair.
| Pro Player | Crosshair Code |
|---|---|
| s1mple | CSGO-PjZ69-KdKxv-CzQDo-HWzvX-oxZPO |
| NiKo | CSGO-oKbbm-szKZb-2Nds3-v5rXf-73bWN |
| ZywOo | CSGO-Tpfn3-WpZsF-yzXCo-UGJkM-QxDHB |
| ropz | CSGO-FtuKX-NcpwP-XBuJG-FW7OA-qF9mO |
| m0NESY | CSGO-D4PLZ-3yRHP-kSoct-p8S6f-HpYtA |
Try each one for a few games and see how it feels. Tweak the size, color, or thickness to your liking. Eventually, you’ll develop your own signature crosshair—built for your eyes, your aim, and your style.
Warm-up Routines and Aim Training Tools
Top Aim Training Maps in CS2
Aim training maps are one of the fastest ways to refine your mechanical skills. The CS2 workshop is full of incredible tools designed specifically to sharpen your flicks, sprays, and crosshair placement.
Must-have maps:
- Aim Botz – The gold standard. Bots surround you in a circle. Great for quick flicks and headshot warmups.
- Yprac Maps – Offers angle training, reaction tests, pre-aim scenarios, and more for specific maps.
- training_aim_csgo – A simple but effective reflex training map to help improve speed and accuracy.
Each map serves a purpose:
- Aim Botz is best for warming up before matches.
- Yprac is great for learning angles and pre-aim paths.
- training_aim is perfect for improving reaction time.
Spend 15–30 minutes daily in one of these maps before jumping into ranked. You’ll notice better consistency within a week.
Flick Shots vs. Tracking Drills
Flicking and tracking are two different aim styles, and you need both in CS2. Understanding the difference helps you train them more effectively.
- Flick Shots:
- Short, sharp mouse movements to snap to a target.
- Used in fast peeks or when enemies appear suddenly.
- Train using bots at different distances and angles.
- Tracking:
- Smooth, continuous aim to follow a moving enemy.
- Crucial for spraying or chasing a strafing opponent.
- Best trained with moving bots or deathmatch servers.
Pro tip: Use deathmatch servers to practice both in real-game situations. Challenge yourself to use only headshots or burst fire to train discipline.
Mix both training styles to become well-rounded. Flicking wins you opening duels, and tracking helps you clean up when the fight drags on.
Daily Warm-up Routine for Peak Aim
Here’s a powerful 30-minute routine used by semi-pros and streamers to get their aim locked in before competitive play:
- 10 minutes in Aim Botz
- Focus on one-tap headshots
- Keep crosshair movement minimal
- 10 minutes on Yprac Angle Trainer
- Pick one map you plan to play (e.g., Mirage)
- Practice pre-aiming and angle clearing
- 10 minutes of Deathmatch
- Preferably HS-only servers
- Track enemies naturally, train movement and aim sync
Optional bonus: End with a full spray control drill using Recoil Master.
Consistency is the key. Even 30 minutes a day will give you noticeable results in less than two weeks.
Mistakes to Avoid When Trying to Improve Aim
Over-flicking and Under-flicking
These are two of the most common aim errors. You either flick too far past the enemy (over-flick), or not far enough (under-flick). Both cost you duels that should’ve been easy wins.
Why does it happen?
- Over-flicking is usually caused by high sensitivity or panicked movement.
- Under-flicking comes from hesitation or poor crosshair placement.
Fixes:
- Lower your sensitivity to something manageable (most pros use between 1.5–2.5 at 400 DPI).
- Train deliberate flicks in aim maps. Focus on precision over speed.
- Improve pre-aiming so you don’t need to flick much at all.
Aim isn’t just about speed—it’s about control. Better to be slow and accurate than fast and wild.
Ignoring Crosshair Placement
If your crosshair is constantly off-center, pointing at the floor, or aimed at the wrong level—you’ll always be playing catch-up. Many players mistakenly focus only on reaction speed or flick drills, when 90% of aim duels are won by crosshair placement alone.
Don’t train flicks until your crosshair placement is on point. It’s like building a house without a foundation. The fix? Walk through maps slowly, clear angles, and visualize where the enemy might be. Always keep your crosshair ready, not reactive.
Bad Habits That Form Over Time
Even experienced players develop bad aim habits:
- Rushing corners without pre-aiming
- Swinging wide with poor crosshair alignment
- Relying too much on spray instead of tapping
- Getting lazy with warm-ups
The solution? Audit yourself. Watch replays. Record your gameplay. Ask: “Was my crosshair where it needed to be?” The goal is not to aim harder, but smarter.
How to Improve Your Game Sense to Enhance Pre-aiming
Watching Demos and Learning Timings
Game sense isn’t born—it’s learned. And one of the fastest ways to build it is by watching demos. Whether you’re watching your own replays or studying pro matches, demos give you insights you’ll never pick up in regular gameplay.
Here’s what to look for:
- When do players peek certain angles?
- Where do they expect opponents to be?
- How do they react to utility?
For example, watch a pro on Mirage and study how they approach A ramp. You’ll notice they don’t blindly peek—they pre-aim spots based on what they’ve seen, what utility has been used, and how much time is on the clock. These patterns teach you timings—the likely positions enemies will be holding at different points in the round.
Tip: Watch the demo from first-person POV, especially your own. Ask yourself, “Was my crosshair where it needed to be before the fight?” This single question can improve your game tenfold.
Listening for Audio Cues
Sound is a huge part of game sense. CS2’s new audio engine makes footsteps, reloads, scopes, and utility sounds more immersive—and exploitable. Training your ears to pick up subtle cues can help you pre-aim exactly where enemies are coming from.
Key audio cues to master:
- Footsteps – Let you track player movement behind walls
- Utility throws – Know if someone is setting up an execute
- Scoped-in sound – AWP or Scout users give this away often
- Bomb plant and defuse – Time your peeks accordingly
Combining sound cues with crosshair discipline creates deadly results. If you hear someone coming up Banana, don’t panic—just place your crosshair and wait. Let them walk into your aim.
Predicting Enemy Movement Patterns
Top players don’t just react—they anticipate. That’s where pre-aiming meets prediction. Once you understand where players tend to rotate, hold, or hide in specific scenarios, you can begin to set your crosshair before the enemy arrives.
Here’s how:
- Track what parts of the map are clear – If your team has control of Mid, chances are the enemies are stacking the sites.
- Understand rotate timings – On Inferno, a CT rotating from A to B will usually arrive 6–8 seconds after the call.
- Watch for patterns – Some players have habits (like hiding New Box every round). Use that against them.
Pattern recognition + proper crosshair placement = free kills.
Settings and Sensitivity Optimization
DPI and In-game Sensitivity Synergy
Your sensitivity setup is foundational to aiming. Most pros use:
- 400 or 800 DPI
- 1.5 – 2.5 in-game sensitivity
The combination of DPI × in-game sens = your eDPI (effective DPI). Aim for an eDPI between 600–1200 for the best balance between control and speed.
Low eDPI = more precision, but requires larger hand movement
High eDPI = faster, but less control
Test it in aim maps and DM servers to see what feels natural. Don’t copy someone else’s settings blindly. What works for NiKo might not work for you.
Raw Input and Mouse Acceleration
Raw input should always be enabled—it bypasses your operating system’s input filters and gives you true 1:1 tracking.
Mouse acceleration, on the other hand, should be off. Accel makes your aim inconsistent—you move your mouse fast, and it suddenly goes farther than expected. In a precision shooter like CS2, consistency is king.
Settings checklist:
- Raw Input: ON
- Mouse Acceleration: OFF (Windows and CS2)
- Windows Pointer Speed: Default (middle)
This ensures your muscle memory develops properly.
Finding Your Perfect Sensitivity
There’s no magical sens—only the right sens for you. That said, here’s a quick method to test:
- Stand in front of a wall in Aim Botz.
- Flick between two bots 180° apart.
- Adjust until you can do it repeatedly with little effort and no overshoot.
Too slow? You can’t react in time.
Too fast? You overflick.
Once you find that balance, stick to it. The worst thing you can do is change your sens every week. Consistency is key to building elite aim.
Using CS2 Replays to Review Your Aim
Spotting Crosshair Placement Mistakes
Watching your replays is like getting coached by your past self. It reveals mistakes you never notice mid-game—especially with crosshair placement.
Ask yourself:
- Was my crosshair at head height?
- Was I pre-aiming common angles?
- Did I panic flick or miss because of poor positioning?
You’ll quickly see a pattern. Most missed shots don’t happen because your aim is bad—it’s because your crosshair wasn’t where it needed to be.
Make it a habit to review 1–2 key rounds after every session. Improvement comes from feedback.
Reviewing Clutches and Duels
Those 1v1 or 1v2 moments are where crosshair placement and pre-aiming matter most. Review your clutches:
- Where did you die?
- What were you looking at?
- Did you pre-aim the right angle?
You can also learn a ton from rounds you won. See what worked—and repeat it.
Even top pros rewatch their clutches to refine their decision-making and aim under pressure.
How Pro Players Review Their POVs
Pros don’t just grind—they analyze. After every scrim or match, teams review demos to break down:
- Crosshair discipline
- Utility usage
- Movement efficiency
- Missed kills due to poor aim
You should do the same. Create a notebook, track aim mistakes, and set goals:
- “Keep crosshair head-level 90% of the time”
- “Improve pre-aiming on B site Mirage”
Small habits lead to big wins.
Mental Focus and Muscle Memory
Staying Calm in Duels
Tilt is the enemy of great aim. If you get flustered, anxious, or frustrated—you’re going to rush your shots, over-flick, or second-guess yourself.
Stay calm:
- Take deep breaths between rounds.
- Focus on crosshair placement, not frags.
- Reset your mind after a death—don’t dwell on it.
Confidence in duels comes from preparation. If you’ve trained your pre-aims, you’ll trust your muscle memory more and panic less.
Building Consistency Through Repetition
Consistency in aim is like brushing your teeth. It’s boring, daily, and absolutely essential.
Daily drills, warm-up routines, and conscious aim training build the muscle memory you need for clutch moments. Don’t chase flashy flicks. Chase reliable shots.
Commit to:
- 30 minutes of aim training per day
- Weekly replay reviews
- Adjusting habits based on feedback
Over time, your aim will stabilize, and you’ll hit shots that once felt impossible.
Avoiding Tilt and Maintaining Focus
Bad games happen. But tilting—letting your emotions control you—kills your ability to aim well. Tilt leads to rushed plays, broken focus, and lazy crosshair placement.
Prevent tilt:
- Mute toxic teammates
- Take a 5-minute break after 2 bad games
- Focus on improvement, not ELO
Remember: aim improves with patience and persistence. Every missed shot is a lesson.
Community Tips and Pro Advice
Advice from Top CS2 Pros
Want wisdom from the masters? Here are some aim tips from elite players:
- s1mple: “Crosshair placement is everything. If your crosshair is in the wrong place, you’re already dead.”
- NiKo: “Train for headshots. Nothing else. It builds discipline.”
- ZywOo: “Don’t panic. Focus on timing and confidence.”
- m0NESY: “Play like you expect enemies around every corner.”
Notice a theme? These players emphasize positioning and pre-aiming, not raw speed.
What You Can Learn from Streamers
Watching streamers is valuable too. You get:
- Real-time decision-making
- POV insight into angle clearing
- Warm-up routines and daily habits
Watch players like sh1ro, ropz, or Twistzz. Study their crosshair movement. Try to mimic their pre-aim paths in training maps.
Discords and Communities for Aim Coaching
Join communities focused on improvement. Some popular ones include:
- r/LearnCSGO
- Discord servers like “The Crosshair Club” or “CS2 Aim Lab”
- Reddit aim threads and VOD review groups
Engage with others, get your gameplay reviewed, and share feedback. The CS2 community is filled with grinders like you.
Conclusion
Improving your aim in CS2 isn’t about becoming a human aimbot overnight. It’s about building smart habits—crosshair placement, pre-aiming, consistent routines, and controlled mechanics. Start with the fundamentals. Train them daily. Learn the maps. Study the timings. And most of all—keep your crosshair ready.
By focusing on intelligent aim rather than flashy flicks, you’ll start dominating duels, clutching more rounds, and ranking up faster than ever.
FAQs
What is the best way to warm up aim in CS2?
A 30-minute session combining Aim Botz, Yprac maps, and Deathmatch is the best way to warm up consistently. Focus on crosshair placement and one-tap accuracy.
How do I stop over-aiming or missing easy shots?
Lower your sensitivity, and focus on pre-aiming rather than flicking. Train to move your crosshair less, not more.
Is crosshair placement more important than fast reflexes?
Yes. Smart crosshair placement reduces the need for fast reflexes. It positions your crosshair where enemies appear, giving you the edge in every duel.
What’s the difference between pre-aim and pre-fire?
Pre-aiming is aiming before seeing the enemy. Pre-firing is shooting before seeing them. Pre-aim is safe and smart; pre-fire is more of a gamble.
How long does it take to significantly improve aim in CS2?
With consistent practice (30–60 minutes daily), noticeable improvement can happen within 2–4 weeks. Mastery, however, takes months of disciplined play.
