Master the art of anchoring in CS2 with this in-depth guide covering site defense strategies, utility usage, positioning, pro tips, and mindset training to become an unbreakable anchor.
In Counter-Strike 2 (CS2), anchoring a site is one of the most crucial yet underrated roles on the defensive side. Simply put, to “anchor” a site means you’re the last line of defense. You’re the player responsible for holding your bomb site — whether it’s A or B — without immediately rotating off unless absolutely necessary. While your teammates roam or rotate based on intel, you’re the rock that keeps the site secure. Anchors buy time, gather information, and often hold off entire rushes while outnumbered.
But make no mistake — anchoring is far from just “sitting in a corner.” It demands precise mechanical skills, a strategic mind, nerves of steel, and impeccable communication. Whether you’re solo holding a bombsite on Mirage or anchoring B on Inferno while your team stacks A, your job is to delay, deny, and destroy the enemy push as long as possible. And when done right? You become the unsung hero that wins rounds your team shouldn’t have.
The anchor’s toolkit isn’t just firepower — it’s about game sense, timing, and mental fortitude. The ability to choose when to peek, when to fall back, or when to die on the site — all these decisions must be made within seconds, often while under extreme pressure.
Importance of Anchoring in Competitive Play
In ranked games, faceit lobbies, or high-stakes tournaments, anchoring becomes a make-or-break factor. Why? Because attackers thrive on exploiting weak links — and an unreliable anchor is just that. If you abandon a site too early or die without taking anyone with you, you give the enemy free real estate, a planted bomb, and positional control.
Anchors create space not just physically, but psychologically. A strong anchor keeps the enemy guessing. They fear rushing into your site without flashes or proper executes because they know you’re there, ready and waiting.
In coordinated team play, anchors enable your in-game leader (IGL) to make smarter rotations. If the IGL knows you’re trustworthy on the site, they can gamble stack the other one with confidence. That level of trust wins championships.
On the flip side, weak anchoring causes chaos. Your team is forced into retakes, you lose economy rounds, and it breaks momentum. That’s why mastering this role is key if you’re serious about climbing ranks or playing competitively.
Understanding the Fundamentals of Site Anchoring
Roles and Responsibilities of an Anchor
Anchors have one job on paper: Hold the site. But under the surface, it’s far more nuanced.
Here’s what an effective anchor is responsible for:
- Information Gathering: Are you hearing steps, utility usage, or early aggression? Relay that to your team.
- Delay Tactics: Use smokes, mollies, and careful peeks to slow down pushes.
- Frag Potential: Ideally, you get at least one or two kills when the hit comes in.
- Staying Alive: If you die too soon, the site is lost. Smart positioning is your lifeline.
- Calling Rotates: Know when it’s safe to ask for help — and when it’s better to hold your ground.
Anchoring also means knowing your limits. If you over-commit and die with all your utility, you’re doing more harm than good. Great anchors will often live longer and die last — they delay long enough for teammates to rotate, turning a 1v5 into a 3v3 hold.
You also need to be self-sufficient. You can’t always rely on support or double setups. Most of the time, you’re on your own — and that’s by design. It’s a role meant for players who can perform under pressure without constant micromanagement.
Difference Between Anchoring and Rotating
Let’s clear this up: anchoring and rotating are not interchangeable roles.
- Anchoring is proactive defense. You’re staying put, anticipating the enemy’s play, and holding the fort.
- Rotating is reactive. Once your anchor gives the green light or gets overrun, the rotators come in from mid, CT, or the other site to assist or retake.
Good rotators rely on great anchors. If you call for help too early or rotate off with little info, you’re compromising the defense. Worse, it could be a fake — and now you’ve left a site open.
Anchors don’t just hold sites — they hold the round together. That’s why you’ll often see anchors with the lowest movement but the highest impact. Think of players like Perfecto or interz in pro CS: calm, consistent, and clutch under pressure.
Choosing the Right Position to Anchor
High-Risk vs. Low-Risk Positions
Not all anchor spots are created equal. Some give you better visibility and control but come with higher risk. Others are safer but limit your impact. Your job is to know when to play each — and adapt mid-round.
High-Risk Anchor Spots:
- Triple on Mirage A: You’re exposed but have a powerful crossfire with jungle/CT.
- First Oranges on Inferno B: Great for surprise kills but often spammed or mollied.
- Ramp on Nuke A: You get early info but are easily isolated.
Low-Risk Anchor Spots:
- Pit on Inferno A: Hard to clear, good for multi-kills.
- Bench on Mirage B: Great off-angle, allows for repositioning.
- Heaven on Overpass B: Minimal exposure, supports site players easily.
The key is balance. Use risky spots when you have a teammate to bait or trade. Use safe spots when you’re solo or need to buy time. Switch it up — being predictable as an anchor is a death sentence.
Know your economy too. If you’ve got a rifle and utility, you can afford to hold deeper. If you’re on a pistol or solo save, play close angles and surprise spots.
Common Anchor Spots on Popular Maps
Here are some of the best anchor positions across CS2’s most played maps:
- Mirage A: Under Balcony, Firebox, Triple
- Mirage B: Bench, Van, Get Right
- Inferno A: Pit, Graveyard, Mini Pit
- Inferno B: New Box, 1st Oranges, CT
- Overpass B: Pillar, Water, Heaven
- Nuke A: Rafters, Mini, Heaven
- Ancient B: Cave, Dark, Back Site
Study these. Learn the common clears and utility usage for each. And more importantly, change your setup round by round. Smart enemies pre-fire or molly common anchor spots — don’t let them read you like a book.
Essential Mechanics Every Anchor Must Master
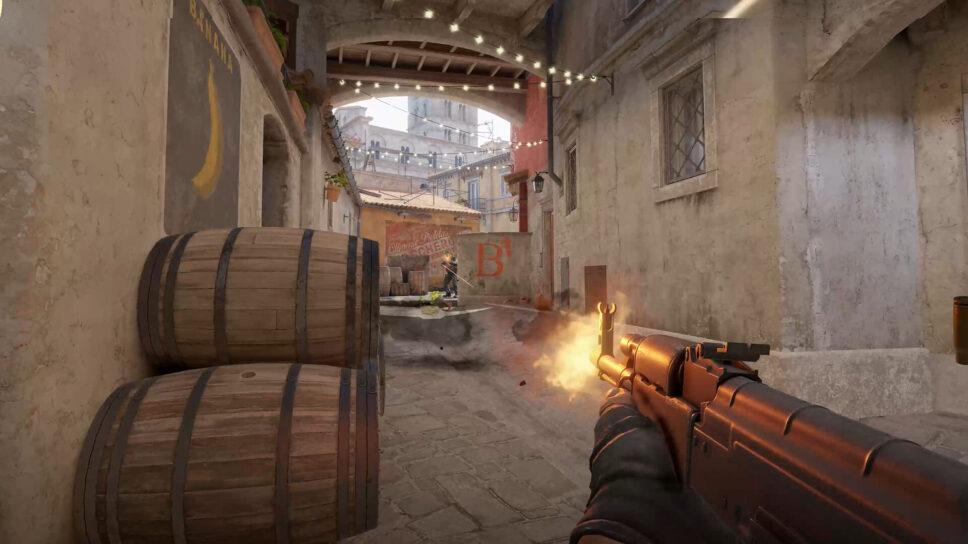
Crosshair Placement and Pre-Aim Angles
Anchoring is 70% preparation and 30% execution. That preparation? It starts with crosshair placement.
Always expect the fight. Pre-aim the common entry angles and keep your crosshair level — chest or head height, depending on your weapon and confidence.
Pro Tips:
- Mirage B Van: Place crosshair at jump height — expect a window boost.
- Inferno Pit: Pre-aim balcony and apps door, don’t panic swap.
- Overpass Water: Expect both short and monster pushes — wide angles needed.
Pre-aiming doesn’t mean standing still. Combine your movement with “jiggle pre-aims” to bait out utility or info. Peek angles the way opponents will enter, and learn how to isolate 1v1s even when you’re outnumbered.
Your crosshair is your compass. Keep it tight, precise, and always ready. Lazy crosshair placement will get you deleted before you can react.
Mastering Movement and Positioning
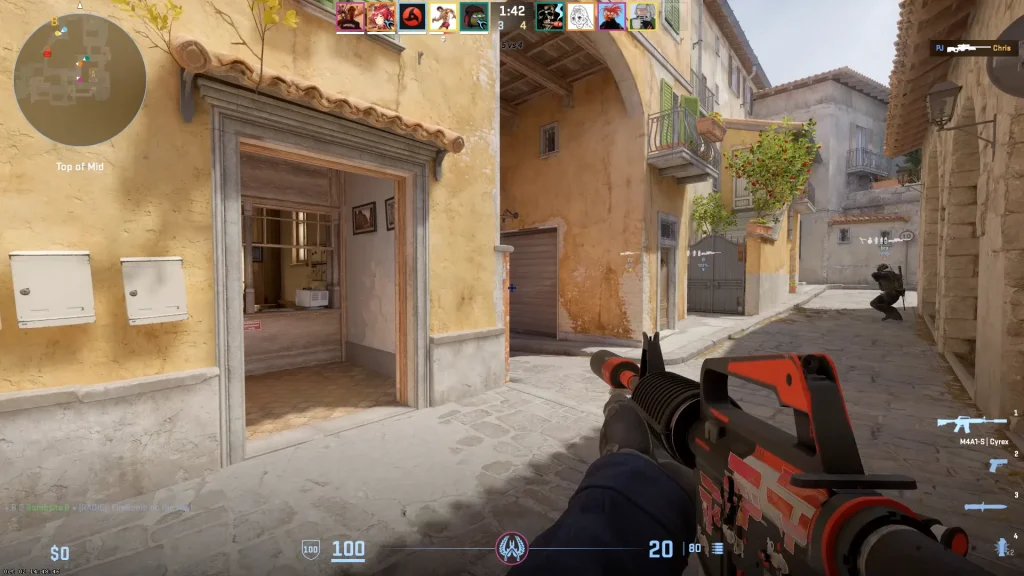
Movement and positioning can make or break your success as an anchor. It’s not just about where you stand — it’s how and when you move that separates solid anchors from liabilities.
Let’s start with movement. You can’t afford to be caught mid-strafe or hopping around as enemies push. Anchors should move with purpose — silent when needed, fast when necessary. Shift-walking behind cover to adjust your angle or doing quick peeks to gather info is far more effective than mindless strafing or “wiggling” for no reason.
Your positioning, on the other hand, needs to strike a balance between being unpredictable and being smart. You should avoid playing the same exact spot every round. If the T-side knows you’re always under balcony on Mirage or behind default on B Inferno, they’ll nade you out before the push even starts.
Change your setups. Some rounds, play close contact angles and catch them off guard. Other times, sit deeper and use utility to stall. Learn when to reposition mid-round. For example, if you’ve just dumped your molly to stop a rush and they pause instead, move to a different off-angle — don’t wait where they expect you.
Also, playing off angles (positions that aren’t commonly pre-aimed) can catch even top-tier players off guard. Standing in the middle of a site may feel exposed, but if your timing is right, it’s deadly. The key is knowing how long you can stay there before becoming predictable.
Finally, anchoring often involves tight spaces, so mastering counter-strafing (tapping opposite movement keys to stop instantly and shoot accurately) is essential. Missing this micro-skill can lead to whiffed shots and a lost site.
Spray Control and Ammo Conservation
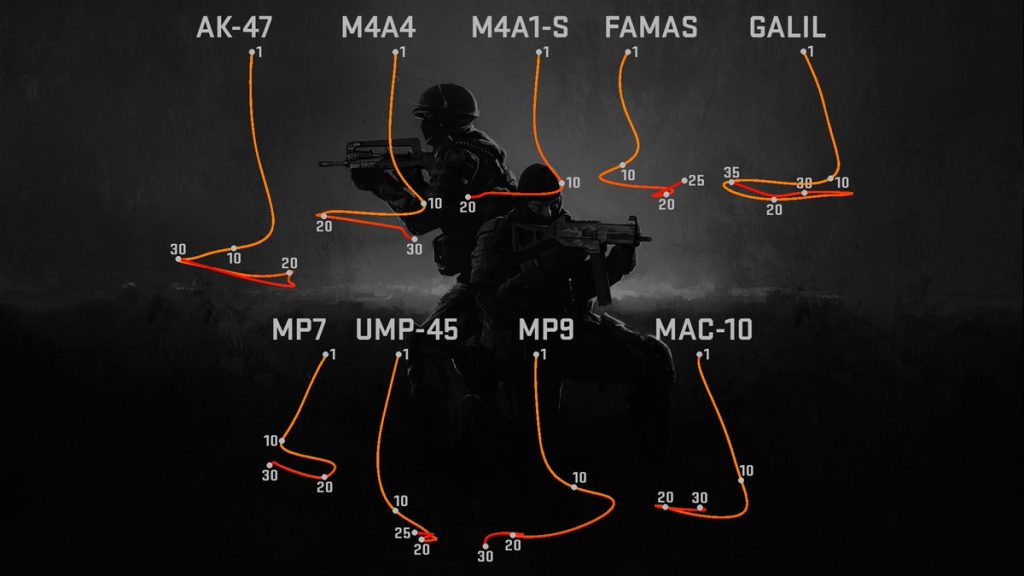
Let’s face it — when you’re anchoring, there are rounds where you’re fighting off three or more players alone. That’s why spray control is one of the anchor’s best weapons.
You don’t always have time to tap or burst when they flood the site. You’ll need to hold mouse one and pray — but it’s only effective if your spray is on point. Practice your sprays in training maps like “Yprac” or “Aim Botz.” Learn how to control your rifle for at least 15-20 bullets without losing aim.
But even more important than that is knowing when to shoot and when to conserve ammo. If you fire off your entire magazine trying to spam through smokes or walls and the hit hasn’t even started, you’ll be left reloading when the real threat shows up.
You should also discipline your sprays. Don’t panic and dump your whole mag at one enemy unless you know for sure they’re committing. If you whiff a few shots, pull back, reposition, and reset. Don’t be the player who dies holding mouse one with zero impact.
Ammo conservation becomes critical when you’re being baited. Smart teams will jump peek or shoulder bait just to make you shoot early, so their entry fraggers face you mid-reload. Be patient. Let them come into your crosshair. Your job isn’t just to get kills — it’s to get value.
That means:
- Getting 1-2 kills
- Burning 10+ seconds off the clock
- Forcing out utility
- Calling for rotations
You don’t need to ace the round — but you do need to make every bullet count.
Utility Usage for Anchoring Successfully
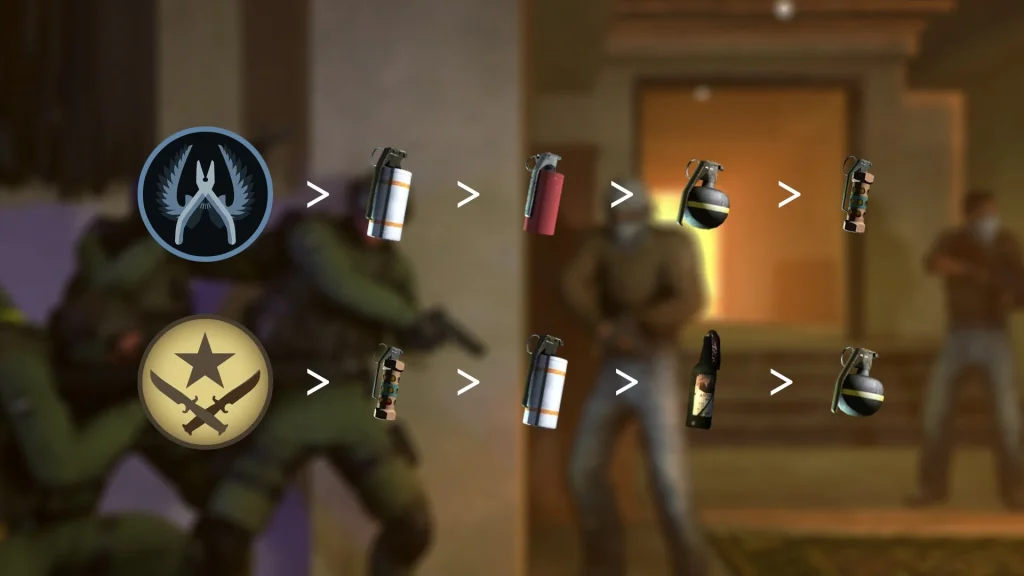
Utility isn’t just for early map control — it’s your lifeline as an anchor. Knowing when and how to use it can stall entire executes and turn a potential loss into a solid hold.
You should treat each piece of utility as a tool with a purpose. A smoke isn’t just to block vision — it’s to delay, to force enemies into unfavorable fights, or to deny a plant. A well-placed molotov can burn out enemies hiding in corners, slow a rush, or force opponents to waste time waiting.
But here’s the thing: many anchors waste their utility in the first 20 seconds of the round out of habit. Instead, learn to delay. Hold onto your molly or smoke unless you get confirmed information (steps, flashes, smokes thrown your way). That way, when the real hit comes in at 1:00 or 0:45, you still have something to stop it.
Also, don’t underestimate the value of flashbangs. Anchors often die with full flashes in their inventory. Even one pop-flash around a corner can blind the entire push and give you enough time to swing and pick off the first few entries.
And then there’s the holy grail of anchor utility: the one-way smoke. If you know how to throw them consistently, you can hold off pushes without being seen. On maps like Mirage (CT smoke on A), or Inferno (deep banana smoke from 1st oranges), one-ways give you that split-second edge to strike first.
Lastly, coordinate with rotators. If you’re anchoring Inferno B and your teammate is Arch-side, ask them to hold a flash ready for your peek. Little synergy plays like this can completely shut down a coordinated T-side execute.
Best Grenade Spots for Delay and Control
Every anchor should have a grenade lineup toolkit specific to the site they hold. Whether you’re playing B on Mirage or A on Nuke, there are a handful of must-know nade spots that help you survive longer and stall enemy momentum.
Let’s break it down by grenade type:
1. Smokes for Delay:
- Mirage B: Smoke apartments entrance from bench or site to cut vision.
- Inferno B: CT smoke from new box to stall vision and delay pushes.
- Overpass B: Monster smoke from pit to control early rushes.
2. Molotovs for Area Denial:
- Mollying under balcony on Mirage A can flush out lurking Ts during post-plant.
- On Inferno B, throw a molly into banana or entrance to first oranges to delay rushes.
- On Nuke A, molly squeaky or hut to deny early control.
3. Flashbangs for Peeking or Counter-Peeking:
- Pop-flash apps push on Mirage A from pit.
- Flash into Monster on Overpass from pit wall for re-peeks.
- Deep CT flash from construction on Inferno B to support teammates during retake.
These nades aren’t just fancy tricks. They’re vital tools to survive the first wave of an enemy hit and potentially turn the tide of the round in your favor.
But timing matters. If you throw all your grenades at 1:55 and they don’t push until 1:10, you’ve wasted them. Get used to “feathering” your utility — staggering your usage based on the enemy’s tempo.
When you have lineups and timing mastered, you don’t just anchor — you lock the site down.
When and Where to Use Your Utility as an Anchor
One of the most common mistakes newer players make while anchoring is panicking their utility away. Whether it’s dumping a smoke too early or throwing a molly with no follow-up, bad utility usage can leave you vulnerable during crucial moments.
Here’s the golden rule: Don’t react. Anticipate.
Start rounds with a rough idea of what you want to do with your utility. If the enemy rushes, you have a plan. If they default, you save some nades. Think in phases:
- Phase 1 (0:00–1:15): Passive info gathering. Hold smokes and mollies unless there’s early aggression.
- Phase 2 (1:15–0:45): Preemptive utility to deny control or stall slow pushes.
- Phase 3 (0:45–0:00): Panic control. Use everything to survive, delay, or fight back.
Let’s use an example. You’re anchoring B on Mirage and hear early steps in apps. Instead of throwing your smoke immediately, you could wait for a flash or a deep molly before responding. That way, you’re not wasting it on a fake.
Or let’s say you’re solo holding A on Ancient. Use your smoke for mid-door to delay mid-splits, and save your molly for cave if you hear them grouping.
Also, communicate! Let your team know “I still have a smoke” or “I used my molly, they could come soon.” That info helps your IGL or rotators decide how to play the rest of the round.
Remember, a smart anchor knows that a grenade saved is sometimes more valuable than a grenade used.
Reading the Enemy and Predicting Site Hits
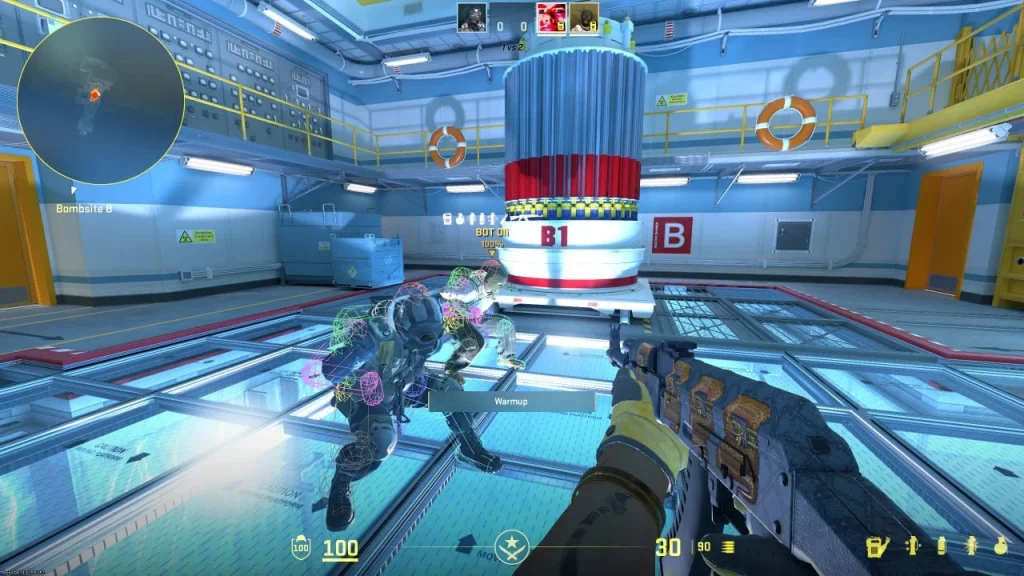
One of the most underrated skills for anchors in CS2 is the ability to read the enemy’s behavior and anticipate when a site hit is coming. Anchors aren’t just mechanical players — they’re site analysts. Every footstep, flash, or smoke can tell you a story. The better you get at reading these signs, the better you’ll be at preparing for the push.
So how do you “read” the enemy?
Start with early utility tells. If you hear or see smokes flying toward your site at the 1:20 mark, you’re probably about to get hit. But if you only hear steps and no commitment with nades, it might be a fake or just map control.
Pay attention to the enemy’s tendencies. If you’ve played against them for several rounds, you’ll notice patterns. Maybe they like rushing B after a timeout. Maybe they always walk through mid at 1:00. Use that to your advantage and adjust your timing. Don’t be caught with a molly in your hand if you know the rush is coming.
Also, if your teammates are getting pressured heavily on the other site or in mid, that may signal a split push. For example, if you’re on B and your mid player gets smoked off or dies, expect a split from short or apps.
Anchors don’t need to be psychic — but they do need to be perceptive. Watch the minimap. Track the killfeed. Listen for footsteps, reloads, and flashes. The more you notice, the better you’ll position yourself to either delay the hit or prepare for an explosive entry.
And always communicate what you hear. Don’t wait until they’re planting. Call “I hear steps top mid” or “They’re setting up for A.” Even if you’re unsure, giving a heads-up gives your team time to rotate or prepare counter-utility. It’s better to over-communicate than stay silent and get overwhelmed.
Solo Holding vs. Duo Setups – When to Anchor Alone
Anchoring isn’t always a lonely job — but sometimes it is. So knowing when to hold solo and when to ask for support is a key skill. The wrong call here can be the difference between winning or losing the round.
Solo anchoring happens more often than you’d think. On maps like Inferno or Mirage, your IGL might leave you alone on B while four stack the opposite site. In these scenarios, your job isn’t to kill everyone — it’s to buy time and give information.
In solo scenarios, you need:
- Safe utility for delay (deep molly or smoke)
- A good fallback position (e.g., bench on B Mirage, new box on Inferno)
- Exit routes for survival (e.g., jumping from van to short or rotating to CT)
The goal? Make them commit before you die. Even one kill and a smoke delay can allow your team to rotate in time for a retake.
Duo setups, on the other hand, allow for more aggressive plays and crossfires. This is especially effective against rush-heavy teams. A common duo setup might be:
- One player deep (bait), one close (swing)
- One site, one off-site (like apps on Mirage B + van player)
- One anchoring while the other plays anti-flash or rotate-ready
The benefit of duo anchoring is trading potential. Even if one dies, the second player can clean up or hold long enough for help. But duo setups are also vulnerable to fakes. If you over-rotate off misinformation, the site can be left empty.
In general:
- Solo hold when you have good delay utility and solid game sense.
- Duo anchor when you expect fast executes or need trade potential.
Smart anchors will adapt round by round, depending on your economy, team setup, and enemy tendencies.
Communication and Calling for Rotates
Let’s be honest — a silent anchor is a bad anchor. You might be a god mechanically, but if you don’t communicate, you’re leaving your team in the dark. And in CS2, timing and rotations win games.
As an anchor, your voice is one of your best tools. Every little piece of info you relay can change the outcome of the round. Even just calling “apps control lost,” “banana smoke up,” or “silent mid walk” gives your team vital context.
But there’s a difference between informing and panicking.
Bad:
“THEY’RE HERE! HELP! I’M DEAD!”
Better:
“I hear 3 banana. Flashing. Using smoke. Might be a B hit. Can someone rotate?”
Use calm, clear comms. State what you see, what you hear, what you’ve used, and what you expect. Don’t wait until you’re dead to tell your team it was a full hit.
When should you call a rotate? That depends on your confidence and utility. If you’ve dumped all your nades, are outnumbered, or can’t hold the push alone, it’s okay to say:
“Come now, it’s a commit.”
Or, if you’ve stalled a bit and need backup:
“They’re slowing down — rotate if needed.”
You can also fake strength through comms. If you say “I’m here with utility,” even if you’re low or out, it can buy just enough time for your team to rotate while the enemy hesitates.
The best anchors pre-call rotations based on what they’re seeing. If you expect a hit in the next 10 seconds, give your team a heads-up before the commit happens. That split-second difference can allow them to arrive in time for a crossfire — or retake setup.
How Anchors Impact Team Strategy and Map Control
Anchors are more than site defenders — they’re strategic pillars in your team’s game plan. A strong anchor allows the rest of the team to make aggressive plays, take map control, or gamble stack the other site.
Let’s take a map like Inferno. If your B anchor is rock-solid, your team can dedicate 3–4 players toward mid or A, knowing B is safe for the first 30–45 seconds. That’s huge. It means mid control can be contested, arch plays can be made, and your opponents are constantly second-guessing their plan.
The same goes for Mirage. If your A anchor is reliable and good with utility, your connector/mid player can roam or support B without risking A being overrun.
Anchors also shape the team’s reactive playstyle. If you call early utility or pressure, your IGL can call for an early rotate or a counter-push on the other side of the map. You’re the early warning system, and every second you survive is another opportunity for your team to reposition and dominate.
And don’t underestimate the psychological pressure of a strong anchor. If the enemy knows your site is hard to crack, they’ll avoid it altogether. That forces them into predictable patterns, which your team can then punish.
In short, anchors give the team confidence. You become the backbone — the consistent player that allows everyone else to shine.
Training Routines to Improve Anchoring Skills
Becoming a great anchor doesn’t just happen from playing more matches. It requires focused practice, tailored to the skills you need in clutch anchor scenarios.
Here’s a breakdown of routines you can implement daily:
1. Aim Training (15–30 mins daily)
- Use Aim Botz or training maps to practice headshot-only drills.
- Focus on one-taps and spray transfers — both are essential for anchors.
- Practice shooting from tight angles or off-angles to simulate site holds.
2. Spray Control Drills
- Use recoil trainers or in-game practice to master 15+ bullet sprays.
- Practice moving then instantly stopping for accurate sprays — vital when re-peeking.
3. Utility Practice
- Load into offline servers and run through every map you anchor.
- Learn consistent smoke, molly, and flash lineups from your anchor positions.
- Practice one-ways and defensive utility throws under pressure.
4. Retake Servers and DM
- Join retake servers as a site defender to simulate anchoring under pressure.
- Play deathmatch from anchor spots — don’t just run and gun. Practice holding positions.
5. Watch Pro VODs
- Study players like Perfecto (ex-NaVi), interz (ex-Gambit/C9), or nafany.
- Watch how they anchor, when they rotate, and how they use utility.
- Learn their habits, their rotations, their timings.
Discipline and deliberate practice will elevate you from a “decent anchor” to a site-locking monster. Don’t just grind — train smart.
Common Mistakes Anchors Make and How to Avoid Them
Even experienced players fall into bad habits when anchoring. These mistakes can be subtle, but they’re often the difference between holding a site or giving it up without a fight. Recognizing and correcting them is key to leveling up your anchoring performance.
1. Overusing Utility Too Early
One of the most common issues is dumping all your utility in the first 15–30 seconds of the round, especially without confirmed enemy presence. If you waste your molly and smoke just because you thought you heard something, you’ll be left defenseless when the actual execute happens.
Fix: Save your nades. Throw with intention. Wait for enemy tells — like flashes, footsteps, or smokes — before responding.
2. Holding the Same Angle Every Round
Predictability is deadly in CS2. If you’re always sitting default or pit or new box, enemies will prefire or pre-nade you into oblivion.
Fix: Change up your position every few rounds. Mix in off-angles, aggressive peeks, or rotate setups to keep the enemy guessing.
3. Panicking During Pushes
Many anchors panic the moment smokes land or flashes start flying, leading to bad peeks or whiffed shots.
Fix: Stay calm. Take a breath. Stick to your practiced routine: delay, reposition, communicate. You’re there to stall — not necessarily ace every round.
4. Dying Without Impact
This one hurts the most. If you die without using utility, without getting a kill, or without calling anything, you’ve just handed the enemy a free site.
Fix: Your death should cost the enemy something — time, health, resources. If you can’t win the duel, fall back, play for time, or at least set up a trade.
5. Not Trusting Your Game Sense
You’ve played enough CS to know when something feels off. Trust your instincts. If you think a fake is coming or a lurker is waiting, play accordingly.
Fix: Anchor with confidence. Trust your reads, and don’t second-guess good habits. CS2 rewards decisiveness.
The takeaway? Being a great anchor isn’t about being perfect — it’s about being smart, calm, and effective under pressure.
How to Anchor Different Maps Effectively
Each map in CS2 presents unique challenges and opportunities for anchors. Understanding how to play anchor roles on different maps is crucial for adapting your style and maximizing your impact.
Inferno
B site anchors are heroes on this map. The narrow choke points make holding Banana a delicate balance. Play deep with early utility, or mix in close-angle plays. Don’t forget to fall back to New Box or First Oranges for post-utility holds.
A site requires smart pit play and balcony control. Cycle between pit, mini-pit, and site itself. Don’t expose yourself to both apartments and short at once.
Mirage
A site anchoring often means playing solo. Rotate between Firebox, Default, Triple, and Under Balcony. Use utility to stall palace and ramp pushes, and call rotations early.
B site anchors should combine Bench, Van, and Get Right positions. Keep your crosshair ready for quick apps pops. If you’re playing with a teammate, set up a short/bench crossfire.
Nuke
Upper site anchors need to handle Hut, Squeaky, and Mini all at once. Rotate through Rafters, Heaven, and behind Default to avoid getting overwhelmed. Lower site holds often happen during retakes, so learn the timings and rotate down smartly.
Overpass
B anchors get tested constantly. Use Monster smokes and water control to delay pushes. Pillar and Heaven are strong spots for stalling. Be vocal if you need early support.
A site players should combine long and bathrooms control with deep-site holds. Rotate between Truck, Dice, and Bank depending on enemy pressure.
Ancient
B anchors need to control Cave and Site. Learn to use the one-way smokes in Cave and mix in Dark holds. Don’t get caught with your pants down against fast lane rushes.
A anchors play aggressively for mid or Temple. Learn to anchor site from behind Default and Tombstone, and save utility for post-plant scenarios.
No matter the map, the principles remain the same: smart utility, unpredictable positioning, and high communication.
The Psychological Game – Staying Calm Under Pressure
Anchoring is a high-pressure job. You’re the last man standing between the enemy and the bombsite, often outnumbered and outgunned. That can lead to panic, overthinking, and tilting. But the best anchors stay calm, calculated, and clutch.
Start by managing your mindset. Don’t think in terms of “I have to kill them all.” Instead, think in terms of impact. Your job is to trade, delay, and gather info — not necessarily win the round solo.
Use routines to stay grounded. Breathe before every round. Focus on crosshair placement and timings, not your scoreboard. Anchor success isn’t always shown in frags — it’s in round outcomes.
If you’re feeling tilted or overwhelmed, take a timeout. Reset your head. Anchoring with anxiety leads to bad peeks, missed shots, and poor communication. Stay in control of your emotions, and your gameplay will follow.
Lastly, visualize success. If you’ve practiced your setups and mechanics, trust your training. Imagine the execute before it happens. See yourself making the right decisions. This builds confidence and reduces panic.
Remember, anchors aren’t flashy — they’re dependable. And that mental fortitude is what makes you the rock of the team.
Pro Player Insights – How the Pros Anchor Like a Fortress
Watching pro CS2 players can give you a blueprint for anchoring like a beast. Players like Perfecto, nafany, b1t, and Jame (yes, even AWP anchors) have redefined how to hold sites smartly.
Perfecto, for example, was known for his B anchor role on NaVi. What made him stand out was his incredible decision-making: when to peek, when to fall back, when to sacrifice himself for time. He rarely overcommitted — and he almost always got value from his life.
nafany, during his time on Gambit/C9, showed how to anchor sites with aggression and unpredictability. One round he’d play close, the next he’d be deep site with a one-way smoke. That mix kept enemies guessing.
Jame might not be a rifler, but his site holds are masterclasses in patience. He uses AWP angles to stall pushes without even firing, creating hesitation and buying rotations.
What can we learn from them?
- Don’t be afraid to play boring — consistency wins.
- Use utility intelligently, not reactively.
- Play around your team’s strengths.
- Never stay in one spot too long.
- Trust your game sense and intuition.
Study demos. Mimic what works. Then adapt it to your own comfort level.
Conclusion
Anchoring a site in CS2 is a demanding but deeply rewarding role. It requires mechanical skill, map knowledge, utility mastery, and above all, a cool head under pressure. You’re not just holding angles — you’re holding your team together.
From mastering positioning and utility to learning how to read the enemy and coordinate rotates, great anchoring is all about balance. You must be unpredictable but consistent, reactive but calm, aggressive but patient.
When done right, you’re the reason rounds are won, momentum is built, and enemies think twice before rushing your site. So whether you’re grinding Faceit or playing in a team environment, take pride in anchoring. Become that immovable wall — the one who locks down sites, stalls rushes, and changes the game.
FAQs
Can I anchor a site as an AWPer?
Yes, but it’s a different style. AWPer anchors like Jame hold deeper angles and use long sightlines to delay pushes. Just make sure you have escape routes and team support.
What’s the best anchor spot for beginners to practice?
B site on Mirage or Inferno is a great starting point. They have clear choke points and solid defensive options to learn delay and hold tactics.
Should I always call for a rotate if I hear noise?
No. Noise doesn’t always mean commitment. Use utility to test if it’s a real hit. If they push through, then call for help. Don’t over-rotate based on sound alone.
How can I improve under pressure?
Practice in high-pressure situations — play clutch servers, DM from anchor spots, or put yourself in tough 1vX scenarios. Mental resilience comes with experience.
How do I know when to peek or hold?
Peek when you have utility support, timing, or info. Hold when you’re outnumbered or need to buy time. Let them walk into your crosshair unless you’re forced to fight.
