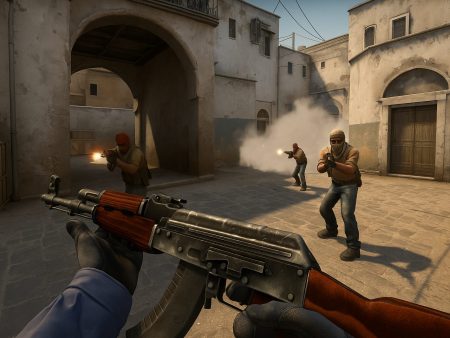
Unlock the ultimate CS2 map guide! Learn essential callouts, pro tactics, and powerful utility lineups for Mirage, Inferno, Dust2, Nuke, and Overpass. Dominate every round with expert-level map knowledge.
Why Map Knowledge is Crucial in CS2

Map knowledge is the backbone of any successful Counter-Strike 2 (CS2) strategy. Whether you’re playing a casual game or grinding your way up the competitive ladder, knowing the layout of each map—every corner, choke point, and hiding spot—gives you a massive tactical advantage.
Let’s put it simply: if you don’t know the map, you’re essentially playing blindfolded. Your opponent might throw a smoke and you’ll have no clue whether it’s to block your vision, fake a push, or prepare for an execute. Meanwhile, a player who knows the map will immediately understand the intention behind that utility and respond accordingly.
A solid understanding of maps also helps with rotations. Let’s say you’re defending B on Mirage and you hear a commotion near A. If you know the timing and travel paths between sites, you can either rotate quickly or hold your ground based on the strategic situation. Smart players use map knowledge to predict flanks, read the enemy’s movement, and even bait rotations.
In CS2, improved graphics and volumetric smokes have made spatial awareness more important than ever. Smokes no longer act like flat walls—they react to bullets and utility. Knowing where a smoke ends and how it behaves in different parts of the map is now a skill you can’t ignore.
Whether you’re an entry fragger or a lurker, map knowledge directly impacts your effectiveness. It helps with positioning, timing, and utility usage. It’s how you go from guessing where the enemy is, to knowing exactly where they’ll be.
The Evolution of Map Design in CS:GO to CS2
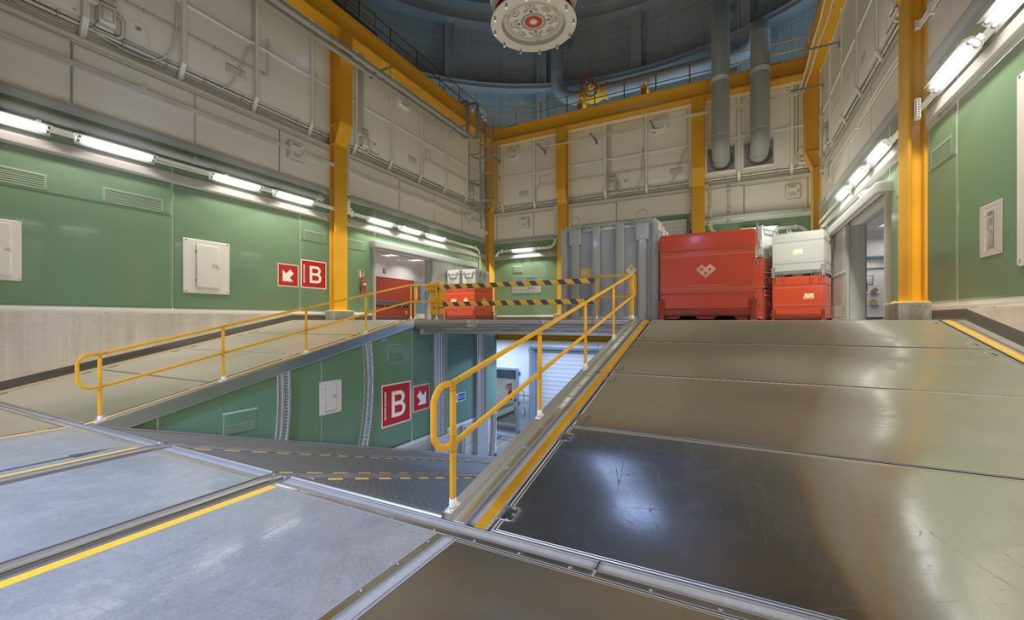
With the launch of CS2, Valve gave many maps a fresh coat of paint—both literally and figuratively. Maps like Mirage and Dust2 retain their iconic layouts but are now visually crisper and more interactive. Others, like Overpass and Nuke, have received changes that directly impact gameplay, from lighting to visibility to object physics.
One of the most game-changing updates is the introduction of volumetric smokes. In CS:GO, smokes were static. In CS2, they interact with bullets, HE grenades, and even environmental lighting. This evolution means that players must now relearn how smokes behave on each map and understand how to use them to their advantage.
For instance, on Overpass, throwing a grenade through a smoke can clear visibility just enough to peek short B or water. On Nuke, an HE grenade can displace a smoke cloud near squeaky, opening up tight angles that were previously sealed off.
Design-wise, Valve has also focused on improving verticality and line-of-sight opportunities. Maps like Nuke and Vertigo rely heavily on understanding multi-layered paths, which adds a new dimension to strategy.
These changes aren’t just visual upgrades—they’re part of a deeper attempt to refresh the meta. Even veteran players are going through a new learning curve, figuring out which tactics from CS:GO still work and which ones need to be reinvented.
Understanding Callouts in CS2
What Are Callouts and Why They Matter
Callouts are short, specific words or phrases used to describe areas of the map. They’re the language of CS2. If map knowledge is your GPS, callouts are the turn-by-turn directions you shout to your team.
Imagine playing on Mirage. You spot an enemy in “Connector.” Saying “One con” is much faster and clearer than saying “There’s a guy between mid and A site.” These callouts keep communication fast, efficient, and most importantly—understandable to everyone on your team.
Callouts matter because time is everything in CS2. A delayed or unclear callout could be the difference between winning and losing a round. Whether you’re defending a bombsite or retaking it, knowing the exact location of enemies—and being able to relay that to your team—is essential.
Some players argue that you can just ping locations or use your mic to say “he’s over there.” But that’s not how high-level play works. Teams rely on structured comms to coordinate executes, stack sites, or bait rotations. Without consistent callouts, the team becomes disorganized.
Learning callouts takes time, but it pays off in every game. Most maps have about 20-30 standard callouts, and learning them is a matter of repetition and exposure. Play the map, watch pros, or use training tools that show callout overlays.
Standard vs. Community Callouts
In CS2, some maps have “official” callouts that appear when you look at certain locations on the mini-map. These are called standard callouts, and they’re generally recognized by the broader community. Think “Long,” “Short,” “Palace,” or “Heaven.”
But the CS community is nothing if not creative. Over time, players create their own nicknames for spots. These are community callouts. They’re not official, but they can become widely accepted over time—like “Ninja” (a sneaky plant spot), or “Sandwich” (the spot between A site and Tetris on Mirage).
Standard callouts are great for clarity. Everyone knows what you mean when you say “CT spawn.” But community callouts add nuance. If your team knows them too, they allow for very specific strategies.
The key is consistency. Before the match starts—especially in a team or stack—make sure everyone agrees on the same terminology. Otherwise, someone might call “Cubby” while another calls the same spot “Pocket,” leading to confusion.
Communicating Effectively Using Callouts
Great communication isn’t just about knowing the right callout—it’s about delivering it clearly, quickly, and calmly. In the heat of a gunfight, you don’t have time for a speech. Your job is to give short, actionable info.
Here are a few tips:
- Keep it short: Say “One cat, low HP” instead of “There’s a guy pushing short and I think I hit him.”
- Use directions if needed: Say “One pushing long, left side” or “One right side of default.”
- Call utility usage: “They smoked CT,” “Flashed out mid,” or “Molly apps.”
- Avoid open mic panic: Screaming “OH MY GOD AHH” doesn’t help anyone.
In CS2, good callouts are even more powerful because the pace of the game has increased. With faster rotations and smoke displacement mechanics, knowing exactly where an enemy is can help your teammate land a prefire or a preemptive nade.
Tactical Gameplay: How to Control the Map
Default Strategies for Both Sides
Every round in CS2 starts with a decision: Do we push aggressively, hold positions, or play default? A “default” is a balanced setup where players spread out across the map to gather information, apply light pressure, and wait for a reaction. This approach is common in pro play because it gives flexibility without overcommitting.
For Terrorists (T side), a default might involve one player watching each lane—one holding apps, another watching mid, one lurking B, etc. This layout prevents CTs from pushing without resistance and gives Ts the freedom to regroup for an execute or pick off a rotator.
For Counter-Terrorists (CT side), the default often includes two players on each site and one floating (usually watching mid or rotating fast between A/B). The CT default is about maintaining control without overextending. You want to hold map control, delay aggression, and retain utility for site defense.
Why is this important? Because overcommitting early can ruin your round. If all five Ts rush A and get wiped by one AWPer and a crossfire, the round’s gone. But if you default, you can pull rotations, waste the enemy’s utility, and catch them out of position.
Here’s the trick: the best teams don’t just default—they react. If they hear two CTs pushing Banana on Inferno, they might decide to stack Mid or go for a fast split to A. If they spot the AWP on Catwalk on Dust2, they might go for a fast B pop.
Defaults work best when you combine them with information gathering. Flash peek an angle. Listen for footsteps. Use utility to provoke a response. Then, once you get a read, collapse on a site as a team.
Map Control: Timing and Pressure
Map control in CS2 is like a game of tug-of-war. Every second, both teams are fighting for space—whether it’s Mid, Banana, Connector, or Ramp. Understanding when and how to apply pressure is what separates good teams from great ones.
Timing is everything. On a map like Inferno, T-side players might take Banana control within the first 15 seconds. If they delay, CTs can take aggressive peeks or set up crossfires. Similarly, on Mirage, mid control early in the round forces the CTs to split attention between B, short, and connector.
But it’s not just about early-round aggression. Mid-round control matters too. Maybe you start slow and then burst into Connector at the 1-minute mark—catching a rotator off-guard. Or maybe you condition the enemy to expect a B hit, then walk up A late with full utility.
CS2’s improved sound design and grenade behavior mean you can also fake map control. Throwing a smoke Top Mid might signal a mid take, but then you walk back and hit B. This constant dance keeps the enemy guessing and forces them to spread thin.
On CT side, pressure is about denying map control without dying. Push too far and you get traded; play too passively and Ts walk all over you. Good CTs will jiggle peek, throw nades to delay, and play off angles to surprise.
Mastering map control means learning timings, practicing grenade setups, and most importantly—reading the game.
Mid Control: The Gateway to Flexibility
In almost every map in CS2, mid control is the holy grail. Holding mid gives you access to both bombsites, split options, and tons of angles for surprise attacks.
On Mirage, controlling mid lets Ts split Connector, Short, or even Window. For CTs, losing mid means you’re blind. Rotations become slower and you risk getting flanked. That’s why CTs often fight hard to keep mid control—smoking Window, mollying Top Mid, and posting an AWPer.
On Inferno, mid is a choke point that controls access to Arch and Library. Winning it can split the A site, but losing it means the enemy can rotate and flank.
And then there’s Dust2—where mid control is vital for both teams. Ts can use it to split B, while CTs can peek Lower Tunnels or boost on Short. Holding mid gives control over the pace of the round.
To win mid, teams need:
- Smokes to block key sightlines (e.g., Window, Top Con)
- Flashes to force AWPers off angles
- Utility to clear corners (Molly boxes, etc.)
- Proper spacing to avoid getting lined up
Once you have mid, your options multiply. You can execute A with a split, bait and rotate to B, or just hold and wait for CT aggression.
Mid is the chessboard center of CS2. If you control it, you control the round.
CS2 Utility Usage by Map
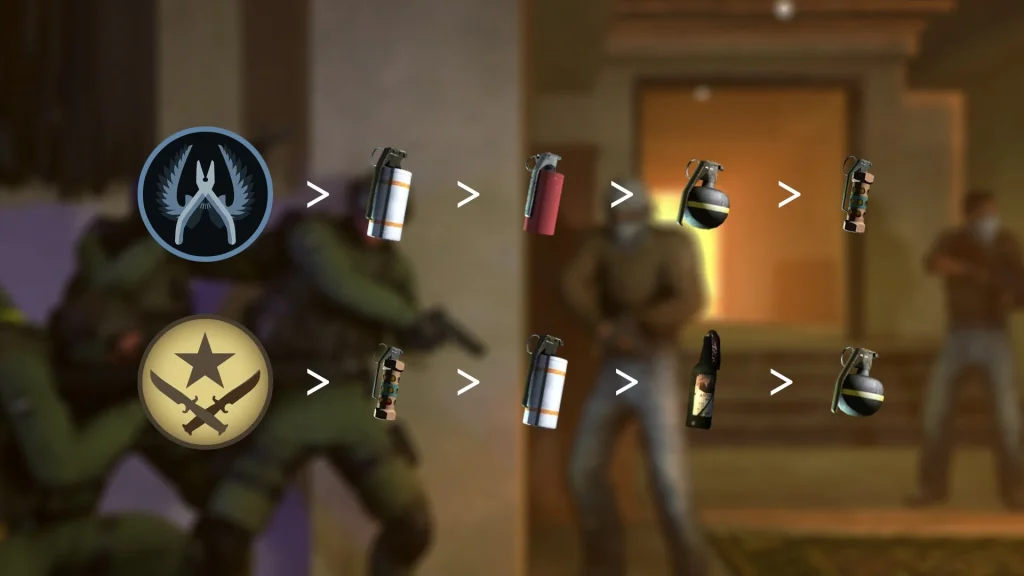
Importance of Smokes, Flashes, and Nades
Utility isn’t just there for highlight reels. In CS2, the proper use of smokes, flashes, molotovs, and HE grenades can win or lose rounds. Especially with the new smoke physics, your utility use is now more impactful than ever.
Let’s start with smokes. Blocking vision is still the #1 use, but now smokes are reactive. You can shoot through them, clear parts of them, or throw nades to disrupt them. This has completely changed how executes and post-plants work.
For example:
- Smoke CT on Mirage, but then HE it to peek a gap.
- Drop a smoke on B site Dust2, then flash through it to surprise a CT.
- Molly deep Banana on Inferno to stop pushes before they start.
Flashes remain crucial. A well-timed flash can get you a free kill or allow a teammate to peek. The best flashes are pop flashes—they explode just out of view, giving the enemy no time to turn away.
Molotovs are zoning tools. They’re perfect for denying space, clearing common angles, or flushing out campers. Throw a molly under Palace on Mirage, or into the corner of Sandbags on Inferno, and you can force a reposition or deal chip damage.
HE grenades are best used predictively—nading common boost spots or post-plant locations. With good timing, you can kill or weaken multiple enemies before they even fire a bullet.
Remember, utility is only useful when combined with good timing and team coordination. Randomly throwing nades might look flashy but won’t win games. Using them to control space, deny pushes, and bait reactions—that’s what wins.
High-Impact Utility Spots
There are a few utility lineups that every player should have in their toolkit. These are smokes and flashes that can change the outcome of a round by blocking vision, enabling takes, or cutting off rotations.
Some high-impact examples:
- Mirage A Execute:
- Jungle smoke
- Stairs smoke
- CT smoke
- Flash over Tetris
- Dust2 Mid to B Split:
- Smoke CT Mid
- Smoke B Doors
- Flash over Mid Box
- Inferno Banana Control:
- Molly Sandbags
- Smoke Coffins for a B execute
- Flash deep Banana for peek
- Overpass B Take:
- Heaven smoke
- Graffiti smoke
- Flash over Monster
Learning these common nades gives you a consistent edge. Even in solo queue, a single smoke can force the enemy to reposition or rotate prematurely.
Use workshop maps like “Yprac” or community servers to practice these lineups until they’re muscle memory.
Utility Lineups for Beginners
If you’re new to CS2 or just never learned utility, don’t worry—it’s easier than you think. Start small. Focus on one or two nades per map, then build from there.
Here are some beginner-friendly lineups:
- Smoke CT on Mirage (from T Ramp)
- Flash Top Mid on Dust2 (from T Spawn)
- Molly Under Balcony on Inferno A Site
- Smoke Heaven on Overpass B Site
Practice these in offline mode or on custom training maps. Stand in the same spot, aim at a specific mark, and throw. Most lineups don’t require jump throws anymore, and CS2’s consistency helps with accuracy.
Eventually, you’ll be able to:
- Execute solo site takes
- Support teammates with flashes
- Delay pushes with molotovs
- Predict enemy positions with HEs
Mastering utility is like learning to cook. At first, you just follow recipes. But once you’re comfortable, you can mix and match, experiment, and even make up your own.
Map Breakdown – Mirage
Key Callouts and Positions
Mirage remains one of the most played and beloved maps in CS2. It’s known for its clean layout, iconic mid control, and balance between both sides. But if you’re not familiar with the callouts, you’ll feel lost even if you know how to aim.
Here are some of the most essential callouts you should master on Mirage:
- A Site: Tetris, Ramp, Palace, Default, Firebox, Ninja, Triple Box, Ticket Booth, CT Spawn, Jungle, Stairs, Connector
- Mid: Top Mid, Window, Catwalk (Short), Ladder Room, Underpass
- B Site: Apartments (Apps), Van, Bench, Back Site, Market, Market Door, Kitchen
- CT Side: Spawn, Jungle, Sniper’s Nest (Window Room), Under Stairs
Each of these callouts plays a strategic role in the map’s layout. For instance:
- Connector is the bridge between mid and A site. Controlling it gives you easy A site splits.
- Underpass is often used by lurkers to surprise mid players or B rotators.
- Firebox and Ninja are cheeky post-plant positions that are hard to clear if not checked.
- Window Room (Sniper’s Nest) gives mid control to CTs and is a key battle zone early in rounds.
Effective communication relies on precise use of these callouts. Don’t just say “on A”—say “behind Triple” or “in Firebox.” That detail can help your teammate pre-aim or prefire the right spot.
Knowing the positions is step one. Understanding how they fit into strategies is what elevates your gameplay.
Common Tactics for T and CT
Mirage has an open mid, which means it plays heavily into T-side strategies revolving around map control and splits. Here are some T-side tactics:
- Mid Control Default:
- Send 2 players to Top Mid with flashes/smokes.
- Smoke Window and Connector.
- One player lurks Underpass.
- From there, you can split either A through Connector or B through Catwalk.
- A Execute:
- Lineup smokes for CT, Jungle, and Stairs.
- Flash over Ramp.
- Molotov Firebox or Default.
- Push with 3 Ramp, 2 Palace or some variation.
- B Fake, A Hit:
- One player throws utility from B Apps (e.g., deep smoke, molly van).
- Rest of the team hits A with full utility.
- Forces rotation from B while leaving A under-defended.
CT-side Mirage tactics are more about retaking mid, setting up crossfires, and keeping map control:
- Aggressive Mid Control:
- Early smoke Top Mid.
- AWPer in Window.
- Support with flashes from Connector or Catwalk.
- Site Stack and Retake:
- Stack A or B based on info.
- Save utility and play retake with flashes and smokes.
- Use Jungle/CT/Market players to flash in teammates.
- Off-Angle Defense:
- Playing in sneaky spots like Firebox, Under Balcony, or Van can net easy multi-kills.
- Combine with bait setups to lure enemies into a trap.
Good Mirage players know when to default, when to rush, and when to fake. It’s a map of mind games, coordination, and timing.
Utility Lineups That Work
To succeed on Mirage, you need a few core utility lineups that are easy to learn but highly effective.
T Side:
- CT Smoke (from Tetris):
- Stand near Ramp.
- Aim at specific window corner and jump throw.
- Stairs Smoke (from T Spawn):
- Stand behind the second pillar.
- Aim at the dot above building, jump throw.
- Jungle Smoke (from Tetris):
- Stand to the left of the wooden pallet.
- Aim above the antenna, jump throw.
Flash Lineups:
- Palace Pop Flash: Bounce it off the wall near Balcony to blind anyone holding A site.
- Mid Pop Flash: Flash from Underpass into Connector or from Top Mid to Window.
CT Side:
- Top Mid Smoke (from Spawn): Useful for denying early mid control.
- Flash into Ramp or Molly Palace early to stall A executes.
Mastering these lineups gives you control over Mirage. Whether you’re defending or attacking, good utility gives your team the edge.
Map Breakdown – Inferno
Callouts You Must Know
Inferno is infamous for its narrow choke points and high-utility duels. If you don’t know the callouts, you’ll be a liability on this map. Inferno rewards information, patience, and coordination.
Key Inferno callouts include:
- Banana: Car, Sandbags, Logs, Half Wall
- B Site: Coffins, New Box, First Oranges, Second Oranges, Dark, CT, Construction
- Mid: Mid, Boiler, Second Mid, Top Mid, Porch, Brackets
- A Site: Pit, Graveyard, Balcony, Default, Mini Pit, Big Pit, Library, Arch
- CT Spawn: Rotates from B, crucial for retake scenarios
These callouts are vital in both communication and strategy. For example:
- “One sandbags” usually calls for a molly or HE to clear.
- “Brackets smoked” indicates T-side presence at Top Mid, preparing for an A split.
- “One Pit, one Site” gives your team all the info they need to set up a retake or prefire effectively.
Precise callouts can win clutches and help your team stack or rotate without overcommitting.
Banana Control and B Executes
Banana is arguably the most important part of Inferno. Gaining or losing Banana control often dictates whether CTs need to rotate early or gamble on a site.
CT Side:
- Early Banana control involves:
- Mollying Bottom Banana.
- Double nades Logs or Car.
- AWPer or rifler posted behind Half Wall.
- Rotating support flashes from CT spawn.
Good CTs play retake Banana or set up bait-and-switch traps to keep Ts guessing.
T Side:
- Gaining Banana means:
- Smoking CT and Coffins.
- Flashes to push out Car and Sandbags.
- Mollying Dark or Oranges before site entry.
A typical B Execute involves:
- CT smoke
- Coffins smoke
- Flash over Half Wall
- Molotov New Box or First Oranges
- Entry with spacing and trades
Banana is like a tug-of-war rope. Win it, and the B site falls with it.
Smoke and Flash Setups
On Inferno, smoke and flash usage is what makes or breaks an execute.
T-Side A Hit:
- Moto smoke (blocks Arch)
- Library smoke
- Pit flash from Mid
- Molly Pit or Site
CT Side:
- Mid smoke early to delay pushes
- Banana deep smoke to force Ts into tight spaces
- Flashes from Pit for retakes
Don’t forget the power of re-smoking CT or delaying with a molly. Inferno is about buying time and forcing bad engagements. Good utility = good rounds.
Map Breakdown – Dust2
Old Classic, New Meta
Dust2 is one of the most iconic maps in Counter-Strike history. While it retains its fundamental structure in CS2, subtle updates to visibility, smokes, and movement have made the meta evolve.
The layout is simple but punishing:
- A Long is a long-range battle zone perfect for AWP duels.
- Short (Catwalk) enables fast A-site splits.
- Mid connects to both sites and is crucial for map control.
- B Site is a fortress with tight choke points and limited entry options.
The new smoke mechanics in CS2 have particularly impacted Dust2. A common example: You used to be able to block Mid Doors with a CT smoke, but now Ts can shoot through it to create visibility gaps. This makes taking Mid more dangerous but also more dynamic.
Teams are now leaning into quicker rotations, more A-short pressure, and even re-aggression through Tunnels mid-round. It’s no longer just “rush B no stop” — it’s about mid-round adaptation, creative use of utility, and faking presence to bait rotations.
A Site vs. B Site Plays
A Site on Dust2 is all about split execution. The most popular T-side strategy is the Long + Short Split. One or two players take Long, two go Catwalk, and they hit A simultaneously. This stresses the CTs because they have to watch multiple angles with limited resources.
CTs often play:
- One AWP at Car or Long Corner
- One rifler Goose or Ramp
- Another floating mid or Short
A good A hit uses:
- CT Smoke
- Stairs Flash
- Molotov Goose or Ramp
B Site is trickier. It’s tight and hard to take without full utility. You often need:
- Mid to B split (from Mid and Tunnels)
- CT Smoke and Window Smoke
- Flash over B Doors
Defending B requires excellent communication. A single player at Platform or behind Car can stall long enough for rotates if they use utility well.
In CS2, teams are experimenting with late B takes using noise on A or fast tunnels pushes right after the round starts. Expect to see more innovative strats as the meta matures.
Best Smokes and Pop Flashes
Here are some Dust2 utility lineups you must know:
Smokes:
- Cross Smoke (from Long): Essential for crossing into A without getting picked by an AWPer at CT.
- Mid to B Smoke (from Xbox): Cuts off CT vision during a split.
- Window Smoke (for B site): Allows entries to focus on back site without worrying about Market.
Pop Flashes:
- Long Corner Pop: A flash thrown over the Long Doors from T Spawn to blind anyone peeking.
- B Entry Flash: From Upper Tunnels, bounce a flash off the wall into site for a surprise entry.
- Short Flash: From Mid, bounce a flash off the wall to blind anyone holding Goose or Ramp.
These are simple yet powerful. Perfecting them makes your Dust2 rounds cleaner and your team more effective.
Map Breakdown – Nuke
Vertical Play and Rotations
Nuke is unlike any other map in CS2—it’s built vertically with two bombsites stacked on top of each other. This unique structure demands mastery of angles, sound cues, and rotation timings.
Key areas include:
- A Site: Hut, Heaven, Rafters, Silo
- B Site: Control Room, Decon, Toxic, Dark
- Outside: Garage, Red Box, Secret, Yard
- Others: Squeaky Door, Lobby, Ramp Room, Vent
Because A and B are stacked, rotations are insanely fast. A CT can drop through Vents and be on B site in seconds. But that doesn’t mean it’s easy—the T-side must apply pressure across multiple areas to keep defenders guessing.
Nuke’s verticality makes sound especially important. A single footstep in Squeaky can give away an A push. A player dropping vent can trigger an immediate rotate from B.
Knowing the map’s soundscape and how to use it is essential on Nuke.
Squeaky Door, Heaven, and Secret Callouts
Let’s break down three of the most important callouts on Nuke:
- Squeaky Door:
- Leads to A site from Lobby.
- Can be used for quick vent dives.
- Commonly spammed and molotoved early round.
- Heaven:
- Above A site.
- A powerful spot for holding A or retaking B via Ladder Room.
- Watch out for flashes—blindness here often means death.
- Secret:
- Path behind Garage leading to B.
- If Ts sneak through Secret, they can get free B access.
- CTs must decide when to contest or give it up and rotate.
These areas are flashpoints for control and rotations. Winning fights or denying access here shifts the balance instantly.
Utility for Executing on Both Sites
To execute effectively on Nuke, you need solid utility:
Outside Take (T Side):
- Smoke Red to Garage
- Smoke Garage to Secret
- Flash over Red for a peek
A Site Execute:
- Molly Hut
- Flash Heaven
- Smoke Main or Mini
B Site Entry:
- Smoke Decon Door
- Molly Dark or Toxic
- Flash Site from Control Room
CTs, meanwhile, use:
- Ramp smoke or flashes for re-peeks
- Molly Squeaky or Lobby early
- Smokes to block Secret or Outside
This map is all about controlling what the enemy can see and when. If you let the Ts walk outside or into Secret for free, you’re playing from behind.
Map Breakdown – Overpass
Controlling Connector and Water
Overpass is a map of control. It’s not about raw aim—it’s about who can dominate Connector and Water first.
Connector links Mid to B Short and is the fastest path for CT rotations. If you’re a CT, holding this spot delays T pushes and gives you info on where they’re headed. If you’re a T, taking Connector allows quick pivots between A and B.
Water (Short B) is a power position for B site control. Ts that hold Short and Monster force CTs to play back site. But CTs that push Water early can disrupt any B exec before it starts.
Best CT approach:
- Push Connector with flashes.
- Smoke Monster or Molly Short.
- Play one deep in Connector for flank.
Best T approach:
- Flash into Connector to clear.
- Hold Short B with an AWPer or support rifler.
- Lurk A for mid-round rotations.
Overpass rewards teams who take early space and punish teams who don’t.
Split Executions: B Site Focus
Most Overpass rounds end with a B hit, and for good reason. B site has multiple entrances: Monster, Short Pipe, and Connector.
A successful B exec often includes:
- Monster smoke
- CT/Heaven smoke
- Molotovs for Barrels and Default
- Pop flashes over site
CTs must be disciplined here. Over-rotating or getting caught in Connector means a free plant for Ts.
Good B hold includes:
- One player barrels or graffiti
- One player short pipe
- One rotate from Connector or Heaven with flashes
Once the plant is down, retaking B is tough. Control Water and Monster, or you’re boxed in.
Flash and Smoke Lineups for Attacks
Essential Overpass utility:
- Bathroom smoke (for long A pushes)
- Bank + Truck smokes (for A site execute)
- Heaven + CT smoke (for B takes)
- Flash into Monster (for both sides)
These smokes help you block off AWP angles and isolate defenders. Flash timings are everything here—well-timed flashes into Short or Monster can win you the site.
Practice these in offline or community maps until they’re second nature.
Conclusion
CS2 map knowledge is not just about memorizing callouts or throwing random smokes—it’s about understanding the flow of each map, knowing when and where to apply pressure, and using utility to sculpt the battlefield in your favor.
Whether you’re controlling Banana on Inferno, taking mid on Mirage, sneaking Secret on Nuke, or faking a B rush on Dust2, map mastery transforms your gameplay from reactive to dominant.
If you’re serious about improving, pick one map and learn it inside-out. Practice utility lineups, review pro matches, and communicate with clarity. The difference between an average player and a clutch god often comes down to knowing the map better than your opponent.
Now get out there, play smart, and dominate every round.
FAQs
How can I remember all the callouts?
Start with one map. Use in-game overlays or community-created minimaps with callouts. Repeat them aloud while playing, and watch pro matches to see them used in context.
What’s the best way to learn utility lineups?
Practice on workshop maps like Yprac or Aim Botz. Focus on 3-4 essential smokes and flashes per map. Repetition is key. Eventually, it becomes muscle memory.
Which map is best for beginners?
Mirage. It has a simple layout, clear callouts, and teaches fundamentals like mid control and A-site splits without overwhelming you.
How do I improve communication in matchmaking?
Keep callouts short and clear. Don’t clutter comms with emotional reactions. Call what you see, not what you think. Example: “One Cat, low HP” instead of “He might be going B, I think.”
Are community maps worth practicing?
Absolutely. Maps like Cache or Tuscan are used in pugs and faceit. Plus, many community maps help with mechanics and utility practice.
