Master your CS2 skills with the ultimate guide to aim training drills and crosshair placement routines. Learn pro strategies, daily routines, and precision techniques to dominate every match.
In CS2, mechanical skill is everything. It’s not just about knowing where to go or what strategy to use—it’s about executing your actions precisely and efficiently. That’s where aim training steps in. Whether you’re climbing the ranks or grinding faceit levels, your aim is the foundation of your performance.
Think about it: no matter how well you position yourself or how smart your play is, if you can’t land your shots, you’re not going to win the fight. CS2 is an unforgiving game—just a split second of hesitation or a slightly off flick can be the difference between a clean headshot and a frustrating death. Aim training helps eliminate that inconsistency. It’s the “mechanical muscle memory” side of the game that sharpens your reactions and helps you dominate your duels.
Another huge benefit? Confidence. When you know your aim is on point, you’ll take more fights, peek more aggressively, and generally play better. Good aim gives you freedom—it allows you to take initiative in games instead of always reacting.
So whether you’re new or a seasoned player, consistent aim training will separate you from the pack. And in a game like CS2, where every millisecond counts, that separation can be game-changing.
How Crosshair Placement Impacts Your Performance

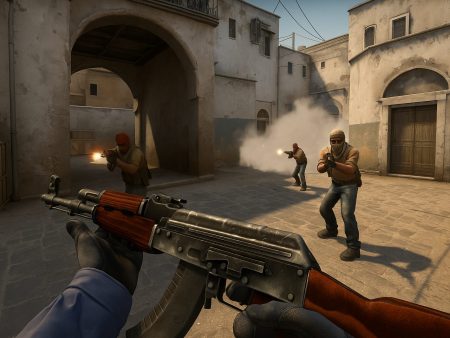
Crosshair placement is one of the most underrated skills in CS2, yet it has a massive impact on how many fights you win. Think of it as the “passive aim” aspect of the game—where your gun is already pointed before the enemy even appears. The better your crosshair placement, the less you have to move your mouse to hit your shots.
Let’s say you’re walking into a common angle on Mirage. If your crosshair is already at head level and aimed at the corner where an enemy might peek, you’re reducing the distance your aim needs to travel. That means faster reaction times and more one-taps. It’s like giving yourself a head start in every duel.
Bad crosshair placement, on the other hand, means you’re constantly playing catch-up. You’re relying too much on fast flicks to adjust your aim, which increases the chance of missing under pressure. No matter how good your raw aim is, poor crosshair discipline will always hold you back.
Here’s the truth: improving your crosshair placement is one of the fastest ways to rank up. It doesn’t require insane reflexes—just consistent awareness of enemy positions, angles, and head level. Master this, and you’ll find yourself landing easier kills with far less effort.
Understanding the Fundamentals of Aim in CS2

Raw Aim vs. Game Sense: What’s the Difference?
To climb the CS2 ranks, you need both raw aim and game sense—but understanding the difference helps you train smarter. Raw aim is your mechanical skill: your ability to flick, track, and hit targets with accuracy. It’s what you build through aim trainers, deathmatch, and repetition. Game sense, meanwhile, is your knowledge and intuition: predicting enemy positions, timing your pushes, and knowing when to engage or fall back.
Here’s where it gets interesting—many players confuse the two. You might dominate in aim trainers but still underperform in real matches. That’s usually because your aim is great, but your decisions (your game sense) are lacking. Or, on the flip side, you might be making great plays but missing your shots due to poor mechanics.
The best players combine both. They know how to pre-aim intelligently based on enemy patterns (game sense) and then execute with crisp headshots (raw aim). So while this guide focuses heavily on aim drills and crosshair placement, always remember that decision-making plays a huge role in your success. Don’t just grind aim—play with purpose.
The Science Behind Flicks, Tracking, and Precision

Let’s break it down: every shot you take in CS2 falls into one of three aim categories—flicking, tracking, or precision.
- Flicking is the art of quickly moving your crosshair to the enemy’s position and firing. It’s essential for hitting enemies who appear suddenly, like when they swing out from cover.
- Tracking is maintaining your crosshair on a moving target, ideal for long engagements or when enemies strafe back and forth.
- Precision is about the final pixel-perfect movement to land headshots, especially useful when holding tight angles.
Understanding these helps you train effectively. For flicks, you’ll want to practice quick, snappy movements with minimal overflick. For tracking, it’s all about maintaining smooth, controlled motion—this is where your DPI and mouse sensitivity matter most. And for precision, the focus is on micro-adjustments—those tiny flicks that make all the difference in clutch moments.
Each of these aim types benefits from different drills, and mastering them all will give you an edge over players who only excel at one. Think of aim like a toolbox—the more tools (skills) you have, the more situations you can handle effectively.
Best Tools and Maps for Aim Training
Workshop Maps You Should Be Using
The CS2 workshop is a treasure trove for aim training, and some of the best maps out there are free and incredibly effective. If you’re serious about improving, these should be part of your daily routine.
Top recommended maps:
- Aim Botz – Training
Probably the most iconic aim training map in CS2. It features a 360-degree arena filled with bots you can configure. Want to focus on headshots? Done. Practice flicks? Easy. You can even adjust the bot movement and speed. - Yprac Aim Arena
Offers a complete training ground with multiple routines like peek training, reaction timing, and more. The best part? It tracks your progress, so you can see improvement over time. - Fast Aim/Reflex Training Map
Perfect for flick and reaction training. Bots run at you in waves, helping you develop quick, reflex-based shooting. - Training Center 1.5c
An all-in-one map with recoil training, moving bots, crosshair placement guides, and more. Great for all skill levels.
Make sure you subscribe to these via the Steam Workshop and launch them regularly. Just 15–30 minutes a day can lead to massive improvements.
Third-Party Aim Trainers (Kovaak’s, Aim Lab, etc.)
While CS2’s in-game maps are excellent, sometimes you need a more focused environment—that’s where third-party aim trainers like Kovaak’s and Aim Lab come in. These tools are scientifically designed to improve your muscle memory, reflexes, and target acquisition.
Kovaak’s FPS Aim Trainer is beloved by CS pros for its flexibility. You can customize everything: target size, movement speed, field of view—down to the pixel. It also allows you to import your CS2 sensitivity settings for consistency.
Aim Lab, on the other hand, adds a layer of gamification. It tracks your accuracy, reaction time, target switching speed, and gives detailed analytics after every session. The best part? It’s free and has CS2-specific playlists.
If you want to supercharge your aim, combine these with in-game practice. Use Kovaak’s or Aim Lab to isolate your raw mechanics, then jump into CS2 to apply them in context. It’s the best of both worlds.
CS2 Aim Training Drills for Beginners
Static Target Shooting
If you’re just starting your aim training journey in CS2, static target shooting is the ideal place to begin. Why? Because it helps you develop baseline accuracy without overwhelming you with moving elements or complex mechanics. The goal here is simple: build muscle memory and improve your shot consistency.
Static shooting drills involve aiming at targets that don’t move. These can be bots in workshop maps like Aim Botz, or targets in third-party trainers like Aim Lab. The idea is to focus entirely on your crosshair control, ensuring you’re hitting the target as close to the center as possible—every time.
Start by standing still and focusing on headshots. Don’t rush it. Accuracy is more important than speed early on. Place your crosshair on the head of the bot, shoot, reset your aim, and repeat. As your confidence builds, you can ramp up your speed gradually.
Here are a few things to keep in mind during static target practice:
- Don’t spray—use one-tap or controlled bursts.
- Focus on crosshair alignment, not flicks (we’ll cover those later).
- Keep your arm and wrist relaxed to prevent over-flicking.
- Train both left and right angles to balance muscle memory.
A great routine would be:
100 headshots on static bots daily for two weeks. You’ll notice a huge improvement in how naturally your crosshair lands on enemy heads in matches.
This type of training is deceptively simple but extremely effective. Every top-tier CS2 aimer, from s1mple to NiKo, has spent countless hours drilling static shots to build a rock-solid foundation.
Spray Control Drills
Let’s be real—landing that first bullet is awesome, but in real games, you’re often going to need to spray down multiple opponents. That’s where spray control comes in. Each gun in CS2 has a specific recoil pattern, and mastering it can dramatically increase your kill count, especially in clutch situations.
The most common weapon you’ll use is the AK-47 or M4A4/M4A1-S, and they have notoriously tricky spray patterns. Without control, your bullets go everywhere. But once you understand the pattern and train your muscle memory, you’ll be able to laser enemies across the map.
Here’s how to train spray control:
- Use a recoil trainer map like “Recoil Master – Spray Training.”
- Select your weapon and fire a full magazine while watching the spray pattern.
- Then, try to replicate the opposite movement with your mouse to “control” the spray.
- Practice 10 full sprays in a row, reset, and repeat.
It’s not just about pulling down your mouse. Each gun’s spray has horizontal variations you need to correct for as well. For example, the AK’s spray drifts to the right after a few bullets—so your counter-strafe should be a downward-left-right combo.
Drill this into your muscle memory. It’ll feel awkward at first, but within a few sessions, you’ll start seeing cleaner multi-kills, especially in short-to-mid-range fights.
Bonus tip: spray transfer is a more advanced version of this drill. After killing one target, immediately shift your aim to another nearby and continue the spray. This is crucial for 1v2 clutch situations or holding bomb sites.
Reflex and Flick Drills
Flicking is that flashy, satisfying movement where you snap your crosshair onto an enemy and pop their head instantly. It’s especially useful for AWPing, but also critical with rifles when you’re peeking tight angles or reacting to sudden enemy appearances.
Reflex training is how you sharpen your flicks—and it’s all about speed and precision. Here’s a beginner-friendly routine using the Fast Aim/Reflex Training map:
- Set bot speed to moderate.
- Stand still and let bots run toward you from random directions.
- As soon as you see one, flick and shoot to the head.
- Do 5-minute sessions with short breaks.
The key here is not to overflick. Flicks should be fast, but not sloppy. Accuracy is still more important than speed, especially when you’re developing the motion.
If you’re using Kovaak’s or Aim Lab, try these scenarios:
- Tile Frenzy (for precision flicks)
- Reflex Shot (for fast reaction time)
- 1wall5targets (for target switching)
Make sure to track your hit percentage and reaction time. Over time, you should see both improving if you’re training consistently.
This type of aim training develops your brain-to-hand connection and helps your eyes and hand move in sync—which is exactly what you need in those tense 1v1 duels.
Advanced Aim Training Routines
Tracking Moving Targets
Once you’ve mastered static targets and flicks, it’s time to take on tracking—the ability to follow moving enemies smoothly with your crosshair. This skill is crucial in CS2 when you’re fighting opponents that strafe left and right or when holding angles where enemies peek you slowly.
In tracking, your aim should feel fluid and sticky, like your crosshair is magnetically locked onto the enemy’s head. It’s less about snapping and more about smooth, steady movement.
Use these methods for tracking practice:
- Yprac Training Grounds – Tracking Drill: Bots move randomly in front of you; try to keep your crosshair glued to their heads.
- CS2 Deathmatch Servers with HS-only enabled: Practice staying on moving targets.
- Kovaak’s Tracking Scenarios: Try “Smoothbot Tracking” or “Air Angelic Tracking.”
Focus on:
- Keeping your mouse movement consistent.
- Not overcorrecting—let your aim “float” onto the target naturally.
- Training with and without strafing yourself, to mimic in-game situations.
You’ll find this especially useful when fighting players who jiggle peek or wide swing. Being able to adjust your aim mid-fight is what separates average players from elite fraggers.
Strafing and Counter-Stafe Practice
In CS2, movement affects accuracy. If you’re running while shooting, your bullets go wild. That’s where counter-strafing comes in—it’s the art of instantly stopping your movement to shoot with full accuracy.
Most newer players struggle here. They peek while moving, and by the time they shoot, they’re still not fully accurate. With good counter-strafing, you can peek, stop, and shoot in a fraction of a second—all while maintaining deadly precision.
To train this:
- Load into Aim Botz or Yprac Peek Training.
- Strafe left or right.
- As you stop, tap the opposite movement key (e.g., tap “D” if you were moving left with “A”).
- Fire immediately after stopping.
Practice this at different speeds and distances. Once you get the timing down, it becomes second nature—and your duels will become much cleaner.
Bonus drill: Use Peek Training maps to simulate real fights. Practice peeking around corners with counter-strafes and firing immediately.
Peek and Reaction Timing Drills
Winning in CS2 often comes down to who shoots first and who reacts faster. Peek training and reaction timing drills simulate real match situations where you’re entering angles or reacting to opponents peeking you.
Use the Yprac Peek Training Map and try this:
- Set enemy bots to appear around corners.
- Practice pre-aiming before you even see them.
- Shoot instantly on reveal.
You can also train against bots in Fast Aim Maps to condition your reflexes. When an enemy suddenly appears, you should already have your crosshair near them—reducing flick time.
What you’re developing here is the ability to:
- Read angles.
- Time your movement to peek intelligently.
- React in under 200ms—the average human reaction time.
Top players live and die by their peeking. If you peek too wide or slow, you’re dead. Too fast without aim readiness? Also dead. These drills help you find that perfect balance.
Crosshair Placement Essentials
Head Level Crosshair Placement
This is arguably the most important concept in CS2 when it comes to winning gunfights—keeping your crosshair at head level. Why? Because headshots kill faster. Especially with rifles like the AK-47, one well-placed shot to the head is all it takes. Crosshair placement makes that happen without requiring last-minute adjustments.
Many players fall into the trap of aiming too low or too high, often unknowingly. This habit forces unnecessary flicking during engagements, increasing the chances of missing. Instead, by maintaining your crosshair at head level while moving through the map, you drastically reduce the distance your crosshair must travel when an enemy appears.
To practice:
- Load into maps like Dust 2 or Mirage, and walk around clearing corners with your crosshair fixed at expected head height.
- Use bots or a friend in a private match to verify whether your crosshair consistently aligns with their heads as they peek.
Here’s a golden rule: imagine an invisible horizontal line across the map at head height, and keep your crosshair glued to it.
Pro tip: Every map has slightly different elevation levels, so part of mastering head-level placement is memorizing each site and angle. Watch demo replays of pro players and study their crosshair placement—they rarely make vertical corrections during fights because their crosshair is already exactly where it needs to be.
Consistently maintaining head-level crosshair placement turns “hard shots” into routine one-taps, helping you win more engagements with minimal effort.
Pre-aiming Common Angles
Let’s talk about one of the most overpowered yet underused skills in CS2: pre-aiming. This is the art of placing your crosshair where an enemy is most likely to be before you actually see them. When done right, it gives you a massive edge—because you’re ready to shoot before your opponent can react.
Pre-aiming isn’t guesswork. It’s based on map knowledge and enemy behavior. Every bombsite, choke point, or corridor has high-probability angles where players love to hold. These include head-glitch spots, tight corners, boxes, and default positions. Learning to pre-aim these positions turns you into a tactical machine.
How to get good at pre-aiming:
- Load a map like Inferno, go to Banana, and visualize where CTs commonly hold (sandbags, behind half-wall, car).
- Move through the area while placing your crosshair on each of those spots in order—before you round each corner.
- Do this slowly, then gradually increase your speed.
You can also use training maps like Yprac Guides which have built-in pre-aim scenarios for popular maps and angles.
Another trick: Use deathmatch with specific intentions. For example, spend 10 minutes only pre-aiming Mirage connector or A-site angles.
Pre-aiming is especially effective in higher elo matches where time-to-kill is lightning fast. Players with better aim still lose to someone who pre-aimed and shot first. It’s all about removing uncertainty and minimizing your reaction burden.
How to Clear Angles Efficiently
Clearing angles is not just a routine, it’s a science. In CS2, one poorly cleared angle can lead to an instant headshot and a round lost. Learning how to clear angles methodically and with purpose transforms you from a mindless peeker to a calculated, dangerous entry fragger.
So what’s the secret? One angle at a time. When entering a bombsite or checking a corner, don’t swing randomly hoping for the best. Instead:
- Slice the pie—turn in small increments to check each possible enemy position.
- Keep your crosshair centered on where an enemy’s head would appear at each slice.
- Avoid overcommitting by peeking too wide and exposing yourself to multiple angles at once.
Here’s a practical routine:
- Load into a map like Ancient and start at T-spawn.
- Move through the map, clearing angles one by one, visualizing where enemies could be.
- Adjust your crosshair accordingly as you progress—don’t let it drift.
When clearing:
- Shoulder peek to bait out shots.
- Jump peek for quick info without full exposure.
- Use utility (flashes, molotovs) to clear angles safely before you commit.
Angle clearing should become second nature. Once you integrate it with crosshair placement and pre-aiming, you become incredibly hard to surprise. Even the sneakiest lurkers and off-angle campers won’t catch you off guard.
Best Crosshair Settings for CS2
Dynamic vs. Static Crosshairs
One of the most common questions in CS2 is: “Should I use a dynamic or static crosshair?” The answer depends on your preference and playstyle—but let’s break it down.
- Static crosshairs stay perfectly still regardless of movement or shooting. This is the most popular choice among pro players. Why? Because it offers precision and consistency. What you see is what you get.
- Dynamic crosshairs, on the other hand, expand or move when you run or shoot. This gives you visual feedback on your movement inaccuracy—helpful for newer players to understand when their shots will be inaccurate.
Recommendation for serious players: Stick with static. It helps build discipline. Once you understand how movement affects your aim, you won’t need the visual cue. Static also makes for cleaner screen real estate, allowing for better focus on your target.
To set this up:
cl_crosshair_dynamic_split “0”
cl_crosshair_outlinethickness “1”
cl_crosshair_drawoutline “1”
Experiment with:
- Color: Use vibrant colors like cyan, neon green, or pink to stand out against map textures.
- Thickness and gap: Keep it tight for headshot precision, but not so small that it’s hard to see.
- Center dot: Optional—some love it for AWPing; others find it distracting.
At the end of the day, pick a crosshair that feels natural, unobtrusive, and functional. And once you find your style—stick with it. Changing crosshairs every week kills consistency.
Pro Player Crosshair Codes to Try
Why reinvent the wheel when you can borrow from the best? CS2 allows players to import crosshair codes used by top-tier pros. This is an easy way to test what feels right and understand how elite players tune their visual game.
Here are a few popular crosshair codes from pro players:
- NiKo (G2 Esports)
CSGO-oYVHK-i3GJQ-KLHNf-22XD5-tnQzD - s1mple (NAVI)
CSGO-LH0KL-0HHHP-8Z26V-2C5AG-KfFZP - ZywOo (Vitality)
CSGO-iTtPx-3pQke-RpDQo-Aoeie-HbLNF - ropz (FaZe Clan)
CSGO-UwBfq-JcUVP-HCCuN-Ff2bX-t9kpE
To use these:
- Go to CS2 settings > Game > Crosshair.
- Click “Share or Import”.
- Paste the code and apply.
Try each one in deathmatch or a training map. Pay attention to how it feels, not just how it looks. If one gives you better clarity or aiming confidence—stick with it.
Using a pro crosshair doesn’t make you a pro, but it gives you a solid, battle-tested template to build from.
How to Create Your Ideal Crosshair
If you want to fine-tune your own crosshair, here’s a quick checklist to build the perfect one for your eyes and style:
- Color: Choose a contrasting color that doesn’t blend with the environment.
- Size: Medium-sized crosshairs work best for rifles; smaller ones are good for precise tapping.
- Thickness: Not too thin (hard to see), not too thick (blocks vision).
- Gap: Adjust to ensure the crosshair doesn’t cover enemy heads.
- Center Dot: Optional—test with and without.
Use the crosshair generator map on the Workshop for a visual way to experiment in real time. You can even shoot walls to test spray patterns with different crosshairs.
Once you find what feels perfect, stick to it long-term. Constantly switching between crosshairs will hurt your muscle memory and reduce your aiming consistency.
Creating a Daily Aim Routine
15-Minute Warm-Up Plan
Before jumping into ranked or scrim matches, a proper warm-up is essential. Just like athletes stretch before a game, CS2 players need to “wake up” their reflexes, coordination, and tracking before going into high-pressure situations.
Here’s a simple but powerful 15-minute warm-up routine you can follow every day:
Minute 0-5: Static Aim Practice (Aim Botz)
- Focus on tapping or bursting.
- Aim for 100 headshots on bots without rushing.
- Concentrate on form and crosshair placement.
Minute 5-10: Tracking & Flicking (Yprac or Fast Aim Map)
- Use a training map with moving bots.
- Focus on keeping your crosshair on target at all times.
- Mix in quick flicks to simulate enemy peeks.
Minute 10-15: Movement and Spray Control (Recoil Master or Deathmatch)
- Practice spraying on moving targets.
- Integrate counter-strafing while shooting.
- If possible, finish with a 5-minute headshot-only DM session.
This compact routine activates every muscle and neural pathway involved in aiming. Even if you don’t have time for long practice sessions, doing this consistently will lead to noticeable improvement.
Hour-Long Training Session Blueprint
For players looking to level up seriously—whether you’re grinding FACEIT, ESEA, or just want to improve—here’s a comprehensive 60-minute training routine used by semi-pros and high-elo players:
0–15 min: Aim Botz (Static Aim + Spray Control)
- Tap 100 heads.
- Spray 50 full clips, focusing on perfect pattern control.
- Practice spray transfers (2–3 targets).
15–30 min: Yprac Maps (Peek, Reaction, Tracking)
- Peek training for Mirage, Inferno, or Dust2.
- Reaction timing with bots popping from corners.
- Tracking drill with strafing bots.
30–45 min: Kovaak’s or Aim Lab
- 3 tracking scenarios.
- 2 precision flicking scenarios.
- 1 speed/target switching routine.
45–60 min: Deathmatch or Headshot Only DM
- Join a high-ping DM server (to simulate stress).
- Focus on crosshair placement, not movement spam.
- Aim for consistent top-10 position by the end.
Consistency is the key here. You don’t need to do this every single day, but 3–4 sessions per week will dramatically elevate your aim, game sense, and clutch potential.
Tracking Your Progress Over Time
One of the most overlooked steps in aim training is tracking your improvement. Most players just practice blindly—but if you can measure it, you can improve it faster.
Here’s how to track aim progress effectively:
- Use Aim Lab or Kovaak’s analytics to log reaction time, accuracy, and kills per session.
- Keep a training journal or spreadsheet. Log:
- K/D in deathmatch
- Spray control rating (based on hit %)
- Reaction time (ms)
- Record clips or full demo replays of games to review aim habits.
You’ll notice patterns over time:
- Are your flicks off to one side consistently?
- Are you panicking under pressure?
- Is your tracking smoother week-to-week?
This insight helps you refine your training focus. Maybe you’re great at flicks but bad at holding angles. That tells you to drill more tracking and passive crosshair placement.
Being analytical turns your practice from just “reps” to targeted improvement, and that’s how you go from Gold Nova to Global.
In-Game Applications of Aim and Crosshair Training
Translating Aim Drills into Real Matches
You might be a beast in aim trainers, but if your in-game aim doesn’t reflect it, there’s a disconnect. The solution? Applying your drills smartly in real matches.
Here’s how:
- Use pre-aims instead of raw flicks during site entries.
- Apply counter-strafing when jiggle peeking or shoulder baiting.
- Use tracking to hold angles and punish jiggle peeks.
Also, avoid the “overtraining trap.” Players often become too mechanical—flicking when it’s unnecessary. In games, less is more. Smart players let enemies walk into their crosshair. That’s the essence of good crosshair placement: minimal movement, maximum efficiency.
During matches, think:
“Can I pre-aim this spot instead of reacting to it?”
Training is about building habits. Real matches are about executing those habits under pressure. Bridge that gap with mindful play.
Common Mistakes Players Make During Matches
Even after all the training, players fall into aim-related mistakes that cost them games. Let’s break down the most common:
- Poor Crosshair Placement
Aim too low or aimed at the floor—this leads to body shots or missed duels. - Moving While Shooting
Not using counter-strafe means bullets fly everywhere. - Overflicking or Underflicking
Due to poor mouse control or bad sensitivity settings. - Peeking Multiple Angles
Players expose themselves to 2–3 sightlines instead of clearing one by one. - Rushing Duels Without Crosshair Preparation
You peek an angle with your crosshair still mid-screen—not ready to shoot. - Changing Sensitivity Too Often
Muscle memory suffers when you tweak settings constantly. - No Warm-Up
Jumping into ranked cold leads to missed shots and lost confidence.
Avoiding these mistakes requires conscious correction and consistent training. The goal is to make good aim habits feel natural—where you don’t even think about it, you just dominate.
Mental Focus and Posture for Better Aim
Mindfulness and Reaction Training
A calm mind = a sharp aim. Stress, distraction, and panic directly impact your reaction time and flick consistency. That’s why incorporating mental training into your CS2 routine is underrated but crucial.
Try this:
- Take 1 minute before each match to breathe deeply, center yourself, and visualize your aim.
- During tense moments, focus on slowing down your thinking instead of rushing shots.
Mindfulness helps in clutch situations—when the pressure is high and your aim needs to be ice-cold.
You can also try dedicated apps or tools like “Reaction Time Test” websites or use Aim Lab’s cognition training scenarios to enhance reflexes and decision speed.
Ergonomics, Mouse Grip, and Sensitivity Tuning
Your gear and posture directly impact your aim. You can’t perform at your peak if your hand is cramping, your elbow is elevated awkwardly, or your mouse is too fast or slow.
Ergonomic Tips:
- Keep your wrist level with the mouse.
- Arm or hybrid grip is best for CS2.
- Avoid resting your forearm entirely on the table—allow freedom of motion.
Mouse Sensitivity:
- Stick to an eDPI range of 800–1600 (DPI × in-game sens).
- Use what’s comfortable, not what a pro uses.
- Avoid high-sens for rifles—too twitchy for consistent headshots.
Bonus: Clean your mousepad and maintain a consistent surface. Even tiny friction inconsistencies affect precision.
Conclusion
Aim training and crosshair placement in CS2 aren’t just routines—they’re your ticket to climbing the ranks, hitting cleaner shots, and building unstoppable confidence. Whether you’re a casual player or grinding for the pro circuit, mastering these skills unlocks your full potential.
Start small—15 minutes a day. Build a routine. Track your progress. Apply it in matches. And most importantly, stay consistent. With the right drills, proper focus, and a mindful approach, you’ll start dominating the server in ways you never imagined.
Keep your crosshair high, your head cool, and your flicks sharp. The rest will follow.
FAQs
What’s the best map for aim training in CS2?
“Aim Botz” and “Yprac Training Grounds” are the most popular for aim training. For specific drills, use “Recoil Master” for spray control and “Fast Aim” maps for flicks and reaction timing.
How long should I train aim daily?
15–30 minutes a day is plenty for casual players. For serious grinders, 1–2 hours of focused practice, including aim trainers and deathmatch, will yield faster results.
Is crosshair placement more important than flicking?
Absolutely. Good crosshair placement reduces the need to flick, making your aim more consistent and efficient. It’s the cornerstone of every pro’s aiming strategy.
What sensitivity do most pros use?
Most CS2 pros use an eDPI (DPI × sens) between 800–1600. The key is consistency, so pick a setting that feels natural and stick with it.
Can aim training help in other FPS games too?
Yes! Good aim mechanics transfer between games like Valorant, Apex, and Overwatch. While recoil and movement might differ, flicks, tracking, and precision are universal.
